Introduction
DNS is essential components of any cloud infrastructure. DNS (Domain Name System) is used to map domain names to IP addresses, allowing users to access their applications via user-friendly URLs.
Users can easily add, modify, and delete DNS within their organizations using our intuitive web-based interface. This allows them to manage their infrastructure more efficiently and with greater control.
Add DNS
-
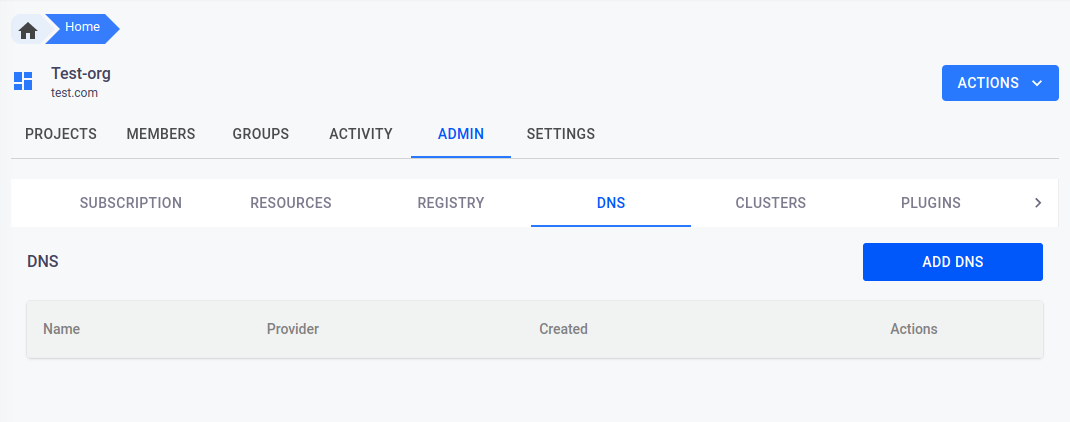
Navigate to the organization page and click on the “Admin” tab. Under the Admin tab, select the “DNS” tab.
-
Click on the
ADD DNSbutton on the top right corner of the page. This will bring up a pop-up window.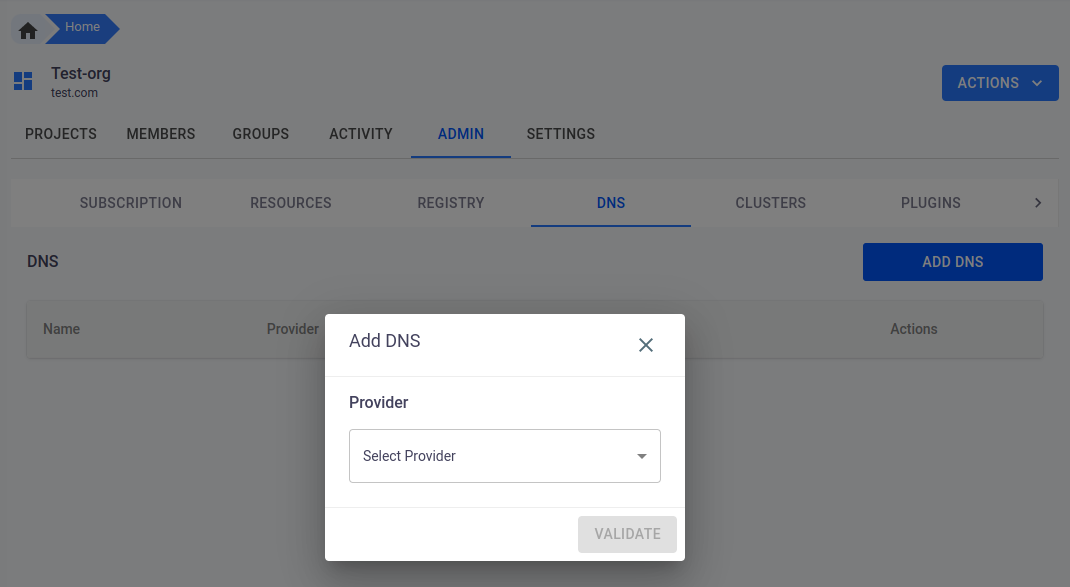
-
In the pop-up window, select the appropriate provider from the drop-down list. For example, if you are using AWS, select
AWSfrom the list.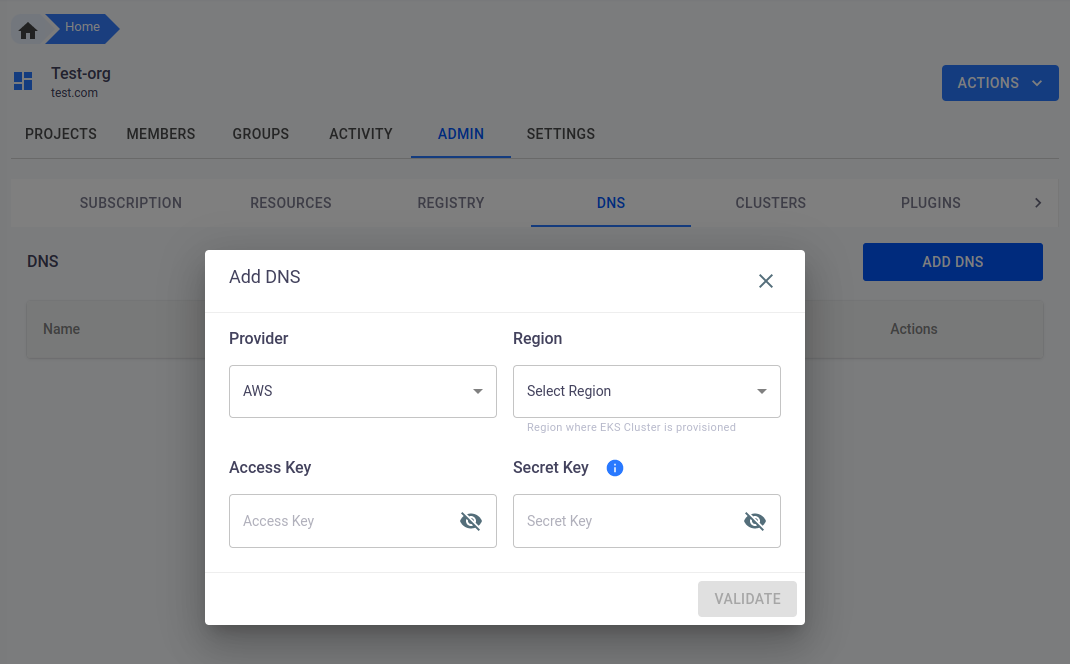
-
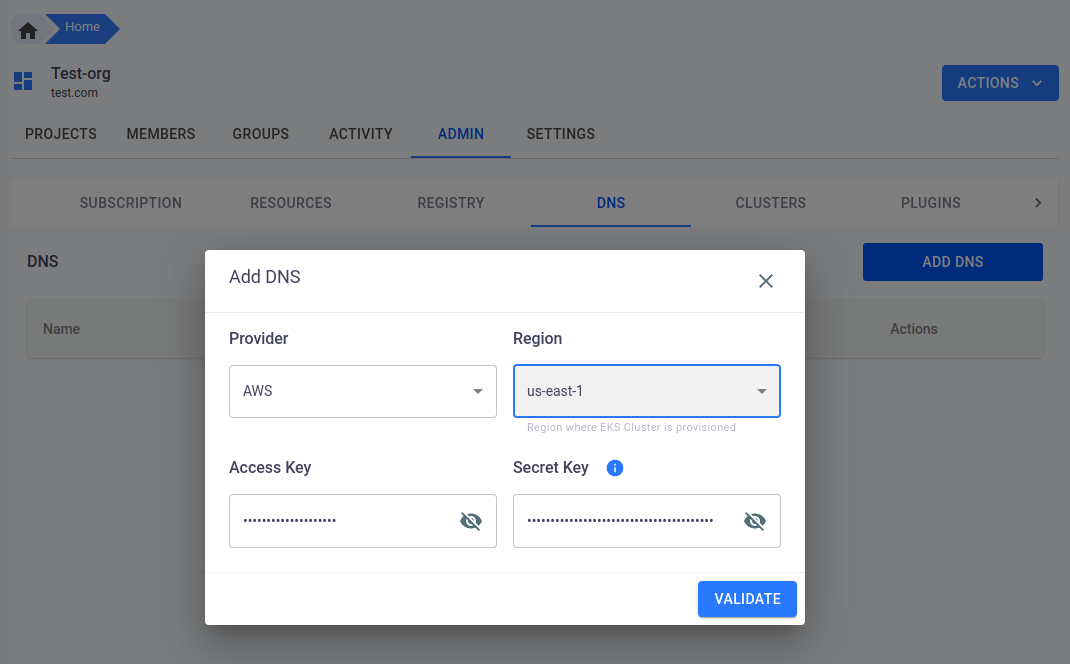
Once you have selected the provider, fill in the required fields. For example, if you selected AWS, you will need to provide the Region, Access key, and Secret key.
-
After filling in the required fields, click on the
VALIDATEbutton. This will validate the information you provided and ensure that it is correct. -
If the validation is successful, you will be prompted to provide the Zone and Base Domain information. These fields are used to configure the DNS settings for your organization.
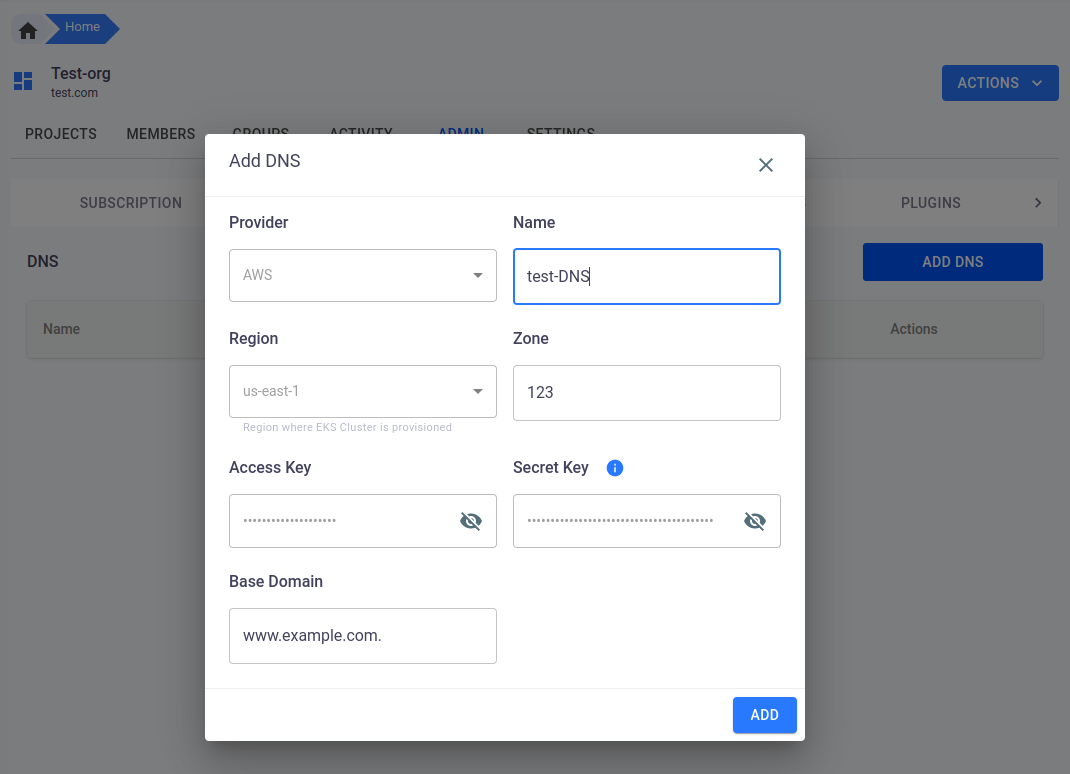
-
After providing the required information, click on the
ADDbutton to add the DNS to your organization. -
The new DNS provider will now be listed on the DNS tab. You can modify or delete the DNS provider as needed.
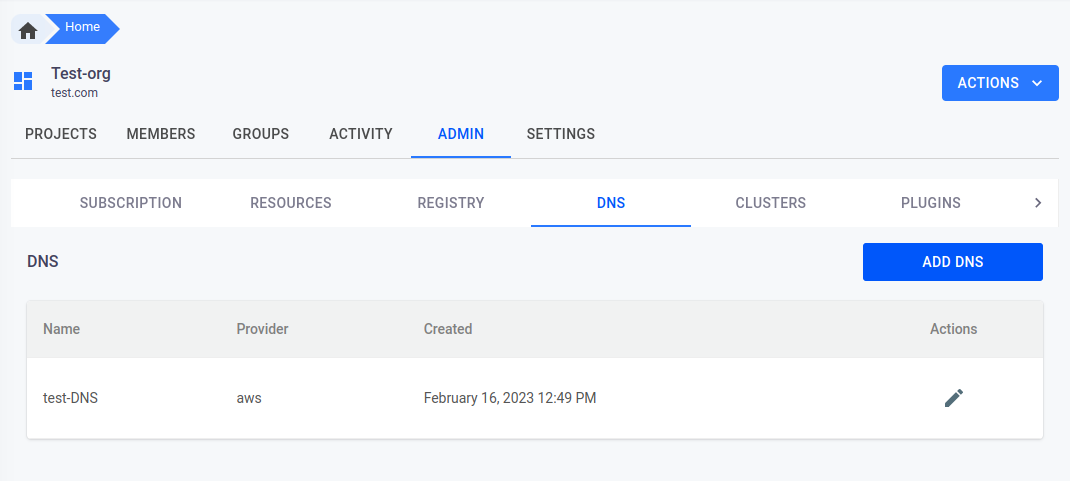
Update DNS
-
Navigate to the Organization page and select the DNS tab.

-
Find the DNS record you want to update and click on the pencil icon on the right side of the row.
-
A popup modal will appear with the current values of the DNS record fields. Make the necessary changes to the fields.
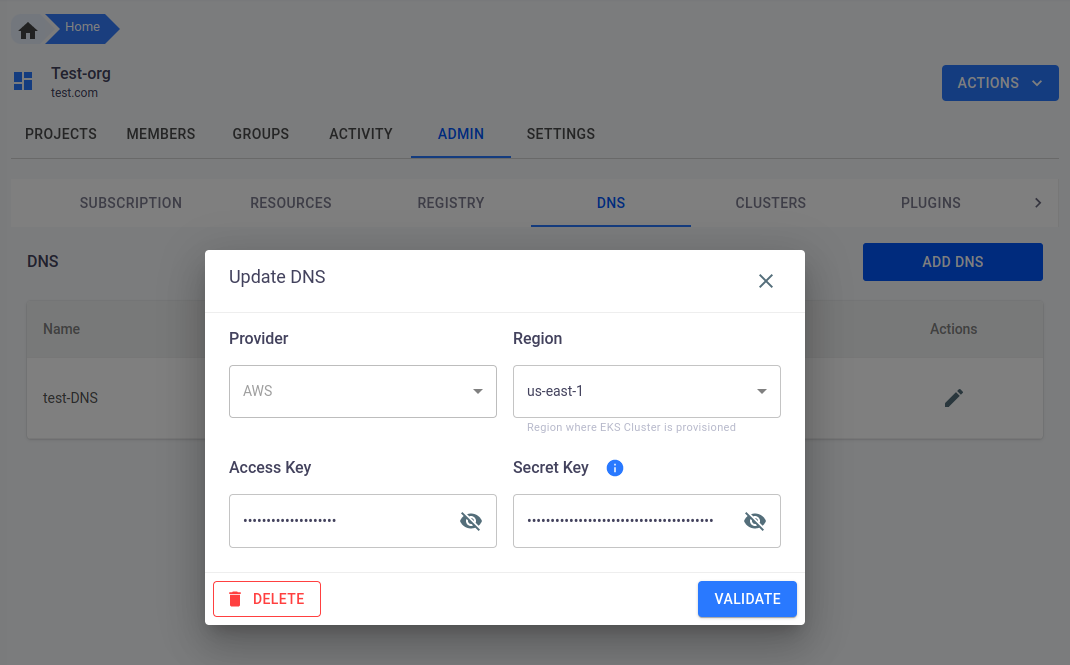
-
Click on the
Validatebutton to ensure that the new values are valid and can be saved. -
Once validated, an
UPDATE DNSmodal will appear where you can update the fields. -
Fill in the new values in the appropriate fields.
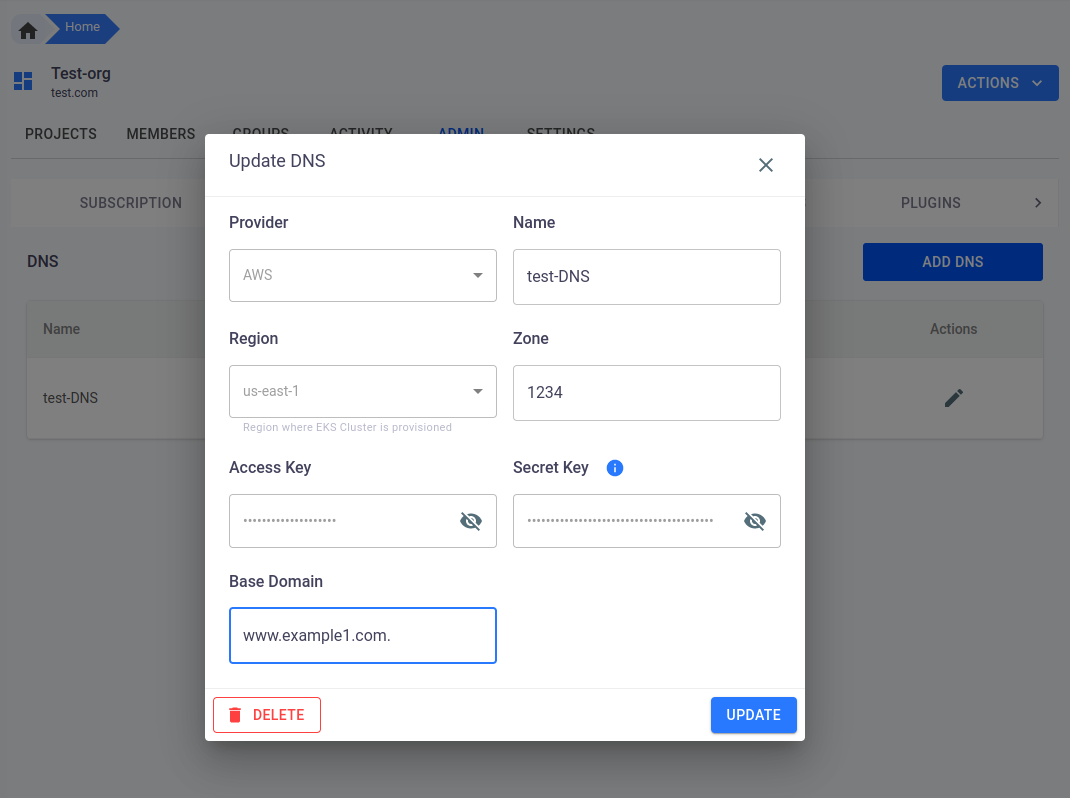
-
Click on the
UPDATEbutton at the bottom of the modal to save the changes. -
After the DNS record has been updated, you will be redirected back to the DNS page where you can see the updated record.

Delete DNS
-
Navigate to the Organization page and select the DNS tab.

-
Find the DNS record you want to Delete and click on the pencil icon on the right side of the row.
-
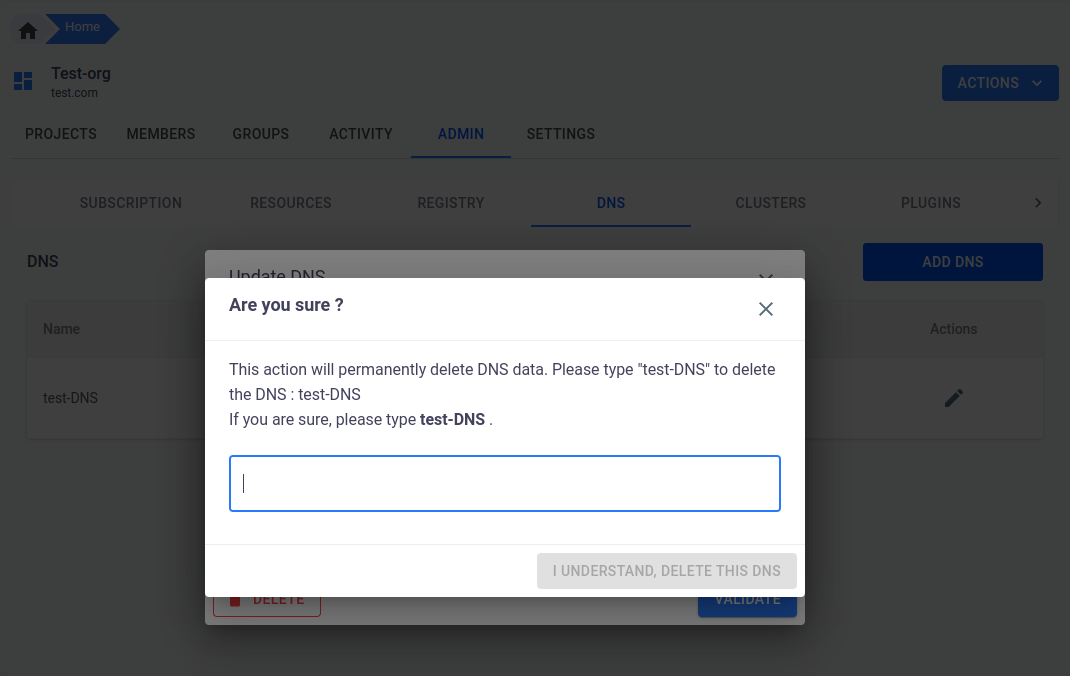
A pop-up window will appear asking for confirmation. You must type the exact name of the Dns in the provided field to confirm that you want to delete it.
-
Once you have confirmed the dns name, click the
I UNDERSTAND, DELETE THIS DNSbutton. -
The dns will be permanently deleted.
Once you have added a registry, you can use it when creating and deploying applications on 01Cloud. Keep in mind that you can also modify or delete a registry by clicking on the appropriate icons in the “Actions” column of the registry table.
