In 01Cloud, an organization is a structured entity that encompasses various features and functionalities crucial for managing resources and services within the platform. It serves as a central hub for overseeing subscription details, allocating and managing resources efficiently, controlling plugins, maintaining DNS settings, managing registries, and organizing chart repositories and catalogs.
Benefits of Using Subscription Management:
-
Subscription Management in 01Cloud allows users to access additional features. Users have the option to create, edit, and delete their subscriptions, as well as activate or deactivate them as needed.
-
Each subscription has specific project level and individual level quotas, which can vary depending on the subscription plan. These quotas help users to manage their usage and ensure that they are getting the most value out of their subscription.
-
When creating a subscription, users can select the subscription plan that best fits their needs and set their preferred subscription preferences. Once created, they can edit or delete their subscription as needed.
-
Users can also activate or deactivate their subscription at any time. For example, they may want to pause their subscription for a certain period of time or cancel it altogether.
Features of Subscription Management:
-
Plan Selection: Users can choose from a variety of subscription plans with different features, resources, and pricing tiers. This allows users to select the plan that best fits their needs and budget.
-
Customization Options: Subscription management systems often offer customization options, allowing users to tailor their subscriptions to specific requirements. This may include adjusting resource allocations, adding or removing features, or modifying billing preferences.
-
Billing and Invoicing: Subscription management platforms handle billing and invoicing processes, generating invoices, tracking payments, and managing billing cycles. This ensures accurate and timely billing for subscription services.
-
Usage Tracking: Users can track their usage of subscription-based services to monitor resource consumption and ensure compliance with usage limits or quotas. Usage tracking helps users optimize resource utilization and avoid overage charges.
-
Renewal and Cancellation: Subscription management systems facilitate subscription renewal processes, allowing users to renew their subscriptions. Users can also cancel subscriptions if they no longer need or want the services.
-
Upgrade and Downgrade Options: Users have the flexibility to upgrade or downgrade their subscription plans as needed. Upgrading provides access to additional features or resources, while downgrading reduces costs by switching to a lower-tier plan.
-
User Access Control: Administrators can manage user access to subscription services by assigning roles, permissions, and access levels. This ensures that users only have access to the resources and features they need to perform their roles effectively.
-
Alerts and Notifications: Subscription management systems may provide alerts and notifications to users regarding subscription status, upcoming renewals, usage thresholds, or other relevant information. This helps users stay informed and proactive about managing their subscriptions.
-
Integration with Payment Gateways: Subscription management platforms often integrate with payment gateways and financial systems to facilitate secure and seamless payment processing. This streamlines the billing and payment process for users.
Steps to Create Subscription:
-
Navigate to the ADMIN tab on the organization page and look for the SUBSCRIPTION tab and click on it .

-
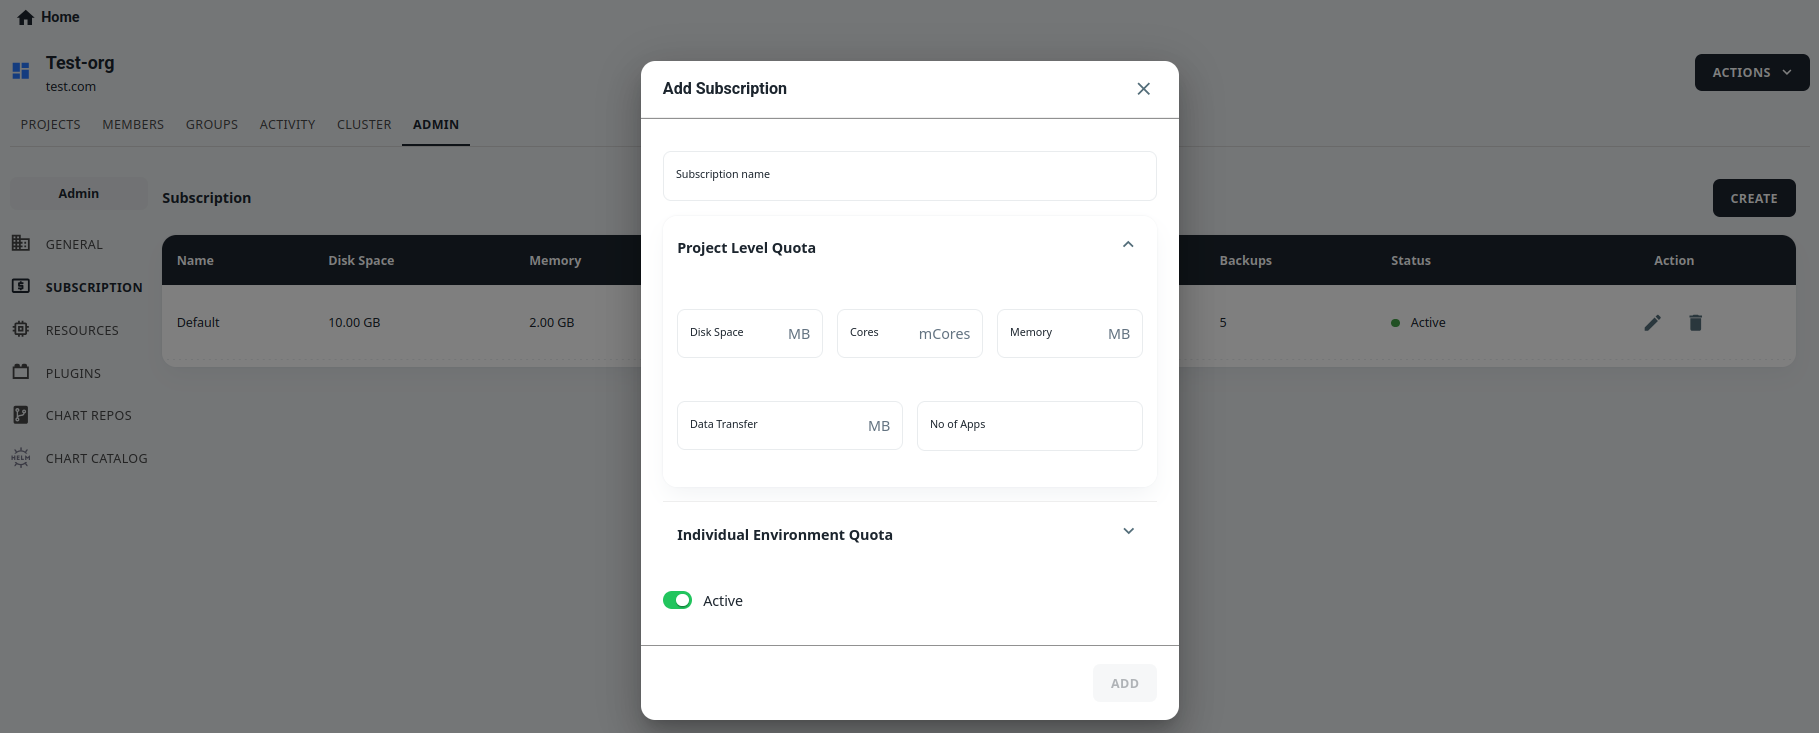
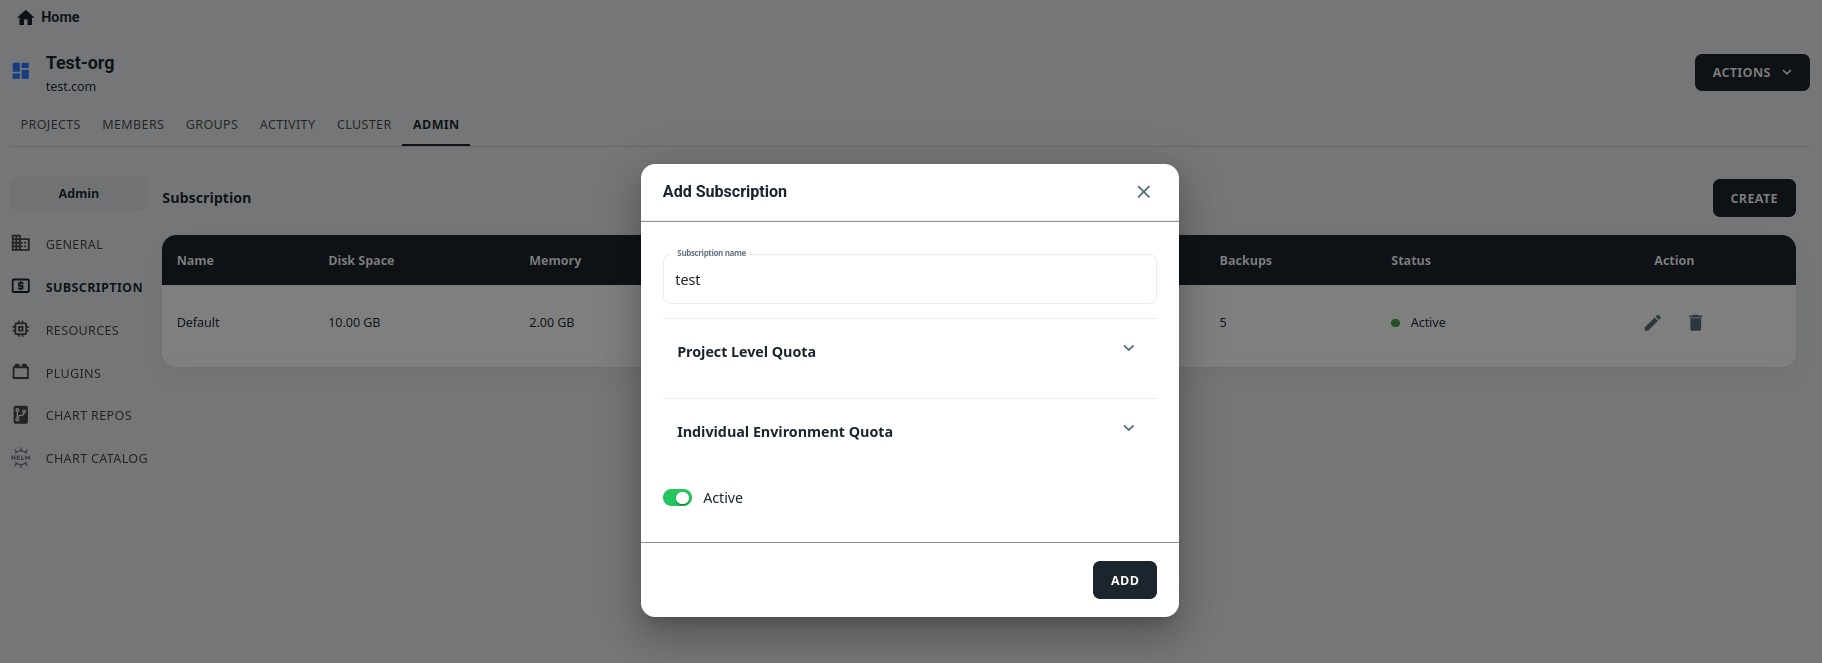
Click on CREATE and In the Add Subscription popup, enter the Subscription Name and Project Level Quotas for the subscription. This consists of fields like Disk Space, Cores, Memory, Data Transfer, and Number of Apps that are allowed to be added on the project. For each field, enter the number that you need for the subscription. For example, if you want to create a subscription that has 100GB of Disk Space, enter “100” in the field provided..

-
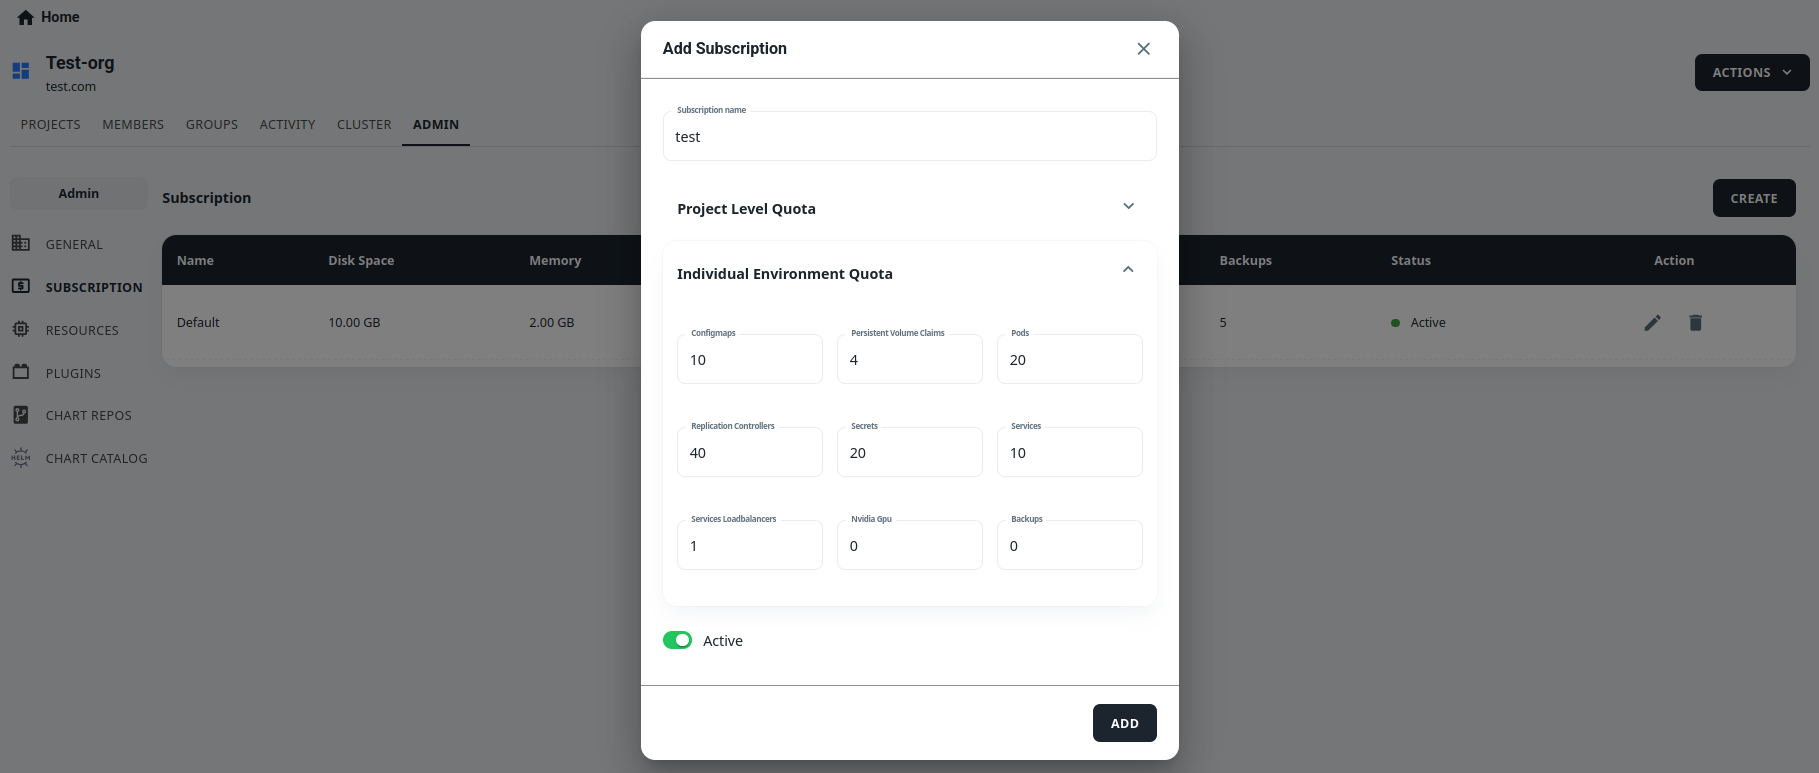
Enter the Individual Environment Quotas for the subscription. This includes fields like ConfigMaps, Persistent Volume Claims, Number of Pods, Replication Controllers, Secrets, Services, Loadbalancers, Nvidia GPU, and Backup Number. For each field, enter the number you want for the subscription. For example, if you want to create a subscription that has 10 ConfigMaps, enter “10” in the field provided.
-
It’s important to note that even if there are no set limits for these subscription fields, the user’s actual resource usage will still be subject to the physical constraints of the system. Setting appropriate quotas can help ensure that users are using resources efficiently and help prevent unexpected costs or outages.
-
-
Toggle the subscription to Active or Inactive as needed.
-
Click on ADD to complete the subscription creation process.

Steps to Update Subscription:
-
Navigate to the SUBSCRIPTION tab in the ADMIN section of your organization page.

-
Find the subscription that you want to edit and click on the Pencil Icon next to it.
-
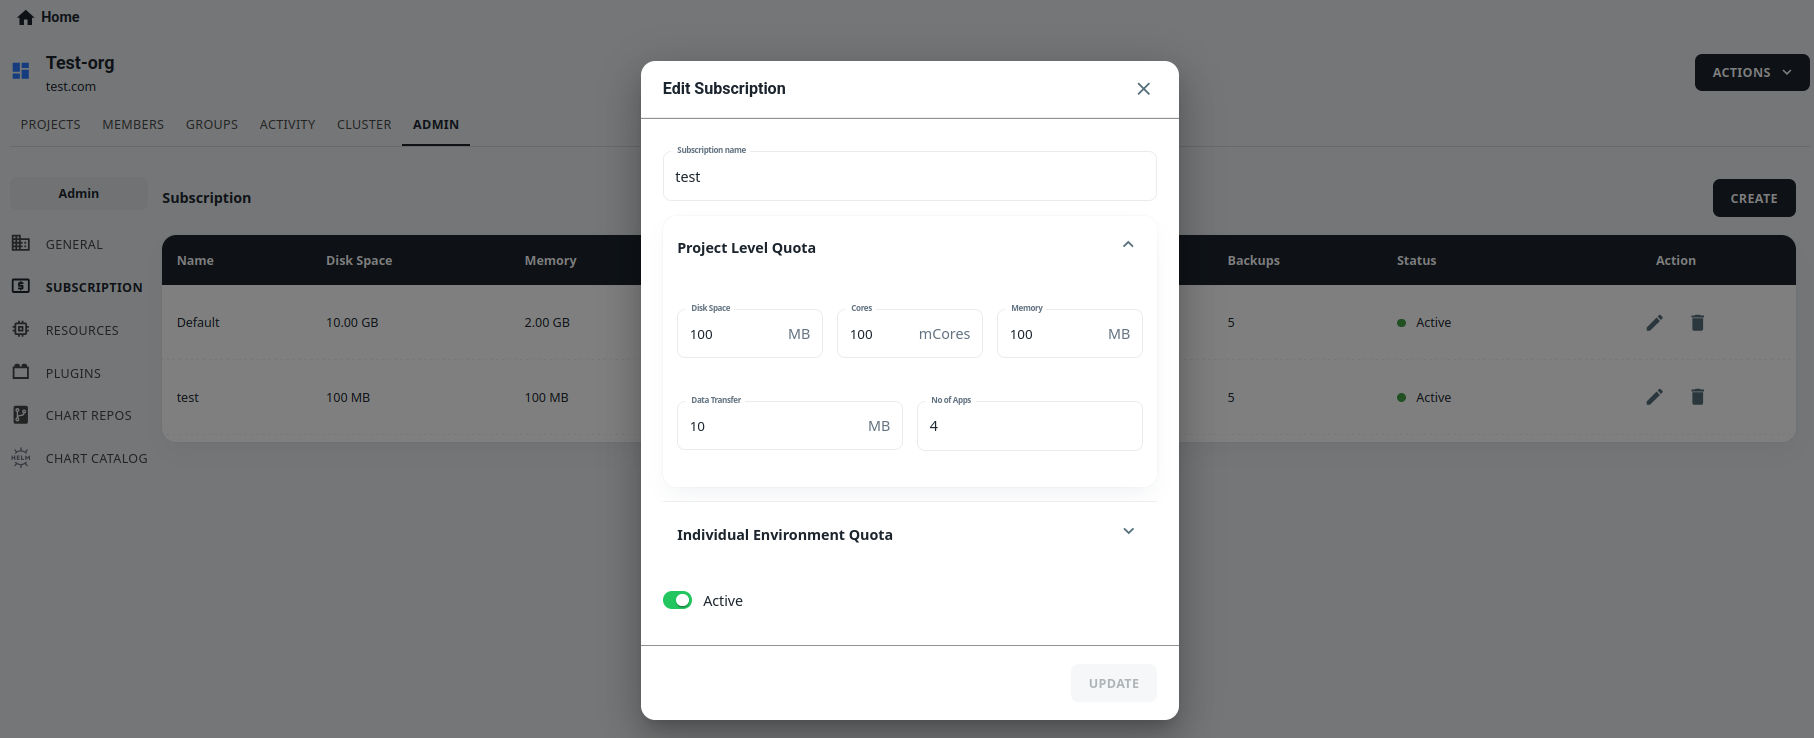
A pop-up window will appear with the subscription details that you can modify. You can change the Subscription Name, Project level Quota, and Individual Environment Quota fields as needed.

-
It’s important to note that the subscription fields can only be upgraded, not downgraded. For example, you can increase the maximum number of pods for a subscription, but you cannot decrease it below the current value. If you need to decrease a field, you can create a new subscription with the desired values and then assign users to the new subscription.

-
If the subscription is not currently active, you can also use the Active/Inactive toggle to enable or disable it.
-
Once you have made the desired changes, click the UPDATE button to apply the changes to the subscription.
Steps to Delete Subscription:
-
Navigate to the SUBSCRIPTION tab in the ADMIN section of your organization page.

-
Find the subscription that you want to delete and click on the Bin Icon next to it.
-
A pop-up window will appear asking for confirmation. You must type the exact name of the subscription in the provided field to confirm that you want to delete it.

-
Once you have confirmed the subscription name, click the I UNDERSTAND, DELETE THIS SUBSCRIPTION.
-
The subscription will be permanently deleted and users who were assigned to that subscription will no longer have access to its features.
Conclusion:
Overall, subscriptions provide a flexible and scalable way for users to access advanced features and content on our website. By providing multiple subscription plans with different levels of quotas, we aim to provide maximum value to our users and ensure that they have a great experience on our website.
