Cluster Management in 01Cloud is a feature that empowers users to create, import, and manage their own Kubernetes clusters according to their specific requirements. This feature not only provides users with the flexibility to utilize the default clusters provided by the application but also offers a platform to create and import custom clusters.
Overview of Cluster Management in 01Cloud:
1. Creation and Import of Clusters:
- 01Cloud allows users to create their own Kubernetes clusters directly within the platform. Users can specify the desired configuration parameters such as cluster size, node types, networking options, and more.
- Additionally, users can also import existing Kubernetes clusters from external cloud providers such as AWS, Google Kubernetes Engine (GKE). This enables users to leverage their existing infrastructure and seamlessly integrate it with 01Cloud.
2. Supported Cloud Providers:
- Users have the flexibility to create and import clusters from popular cloud providers such as AWS, GKE. This broad support ensures compatibility with a wide range of cloud environments, allowing users to choose the provider that best suits their needs.
3. Configuration Options:
- Users can configure clusters either by importing a configuration file or by providing credentials directly within the 01Cloud console. This flexibility accommodates different workflows and preferences, ensuring a seamless user experience.
4. Accessibility in the Create Project Section:
The cluster management feature is accessible from the Create Project section of the 01Cloud platform. This provides a centralized option for managing clusters, allowing administrators to create, import and configure clusters directly within the project setup workflow.
Steps to Create Cluster in 01Cloud organization:
-
After logging into 01Cloud account, go to the create project section and click on the Cluster option.

-
After entering into the cluster section, click on Create for creating new cluster.

-
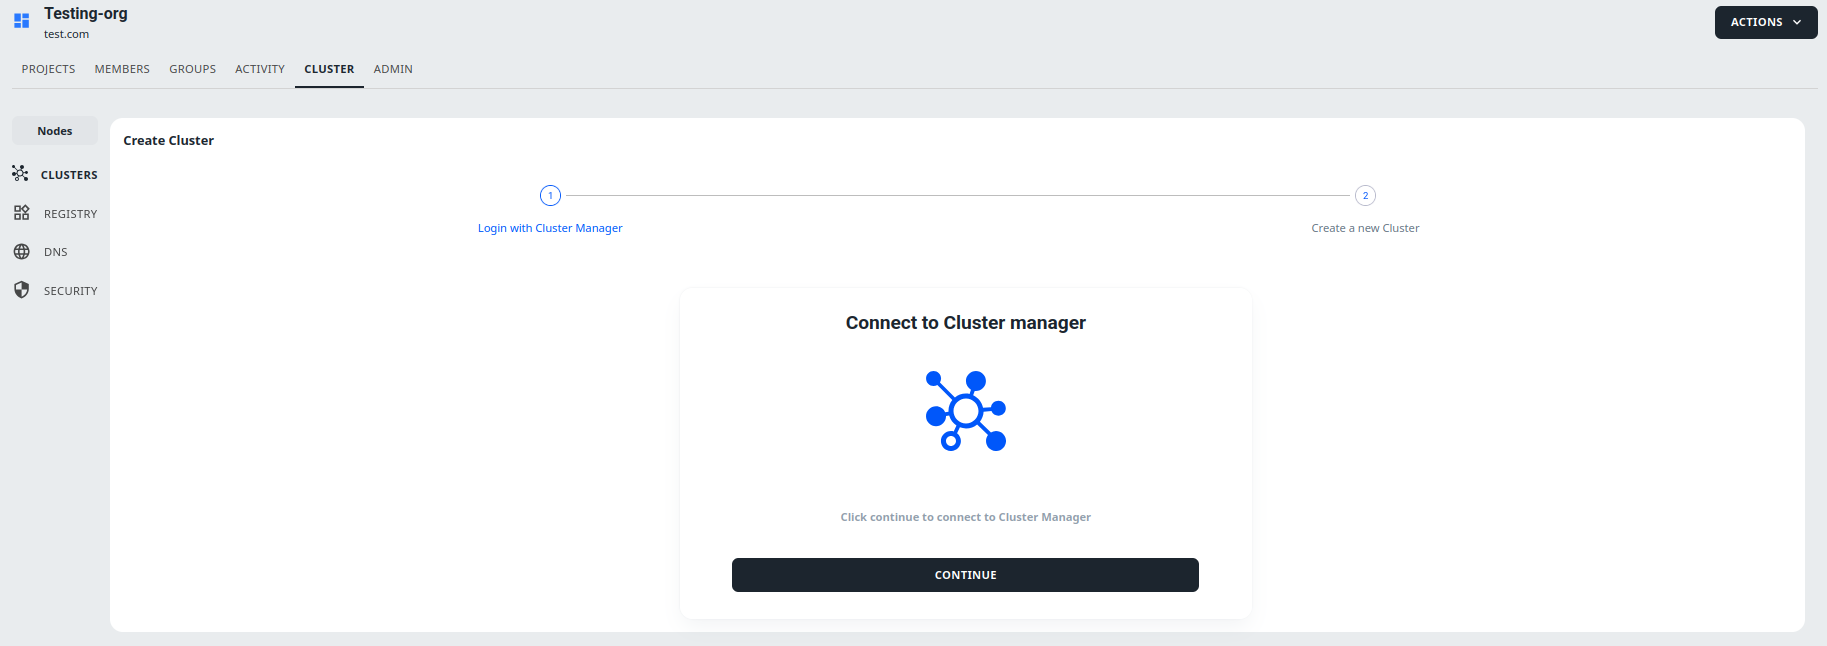
After click on creating cluster, user can able to login with cluster manager interface.
-
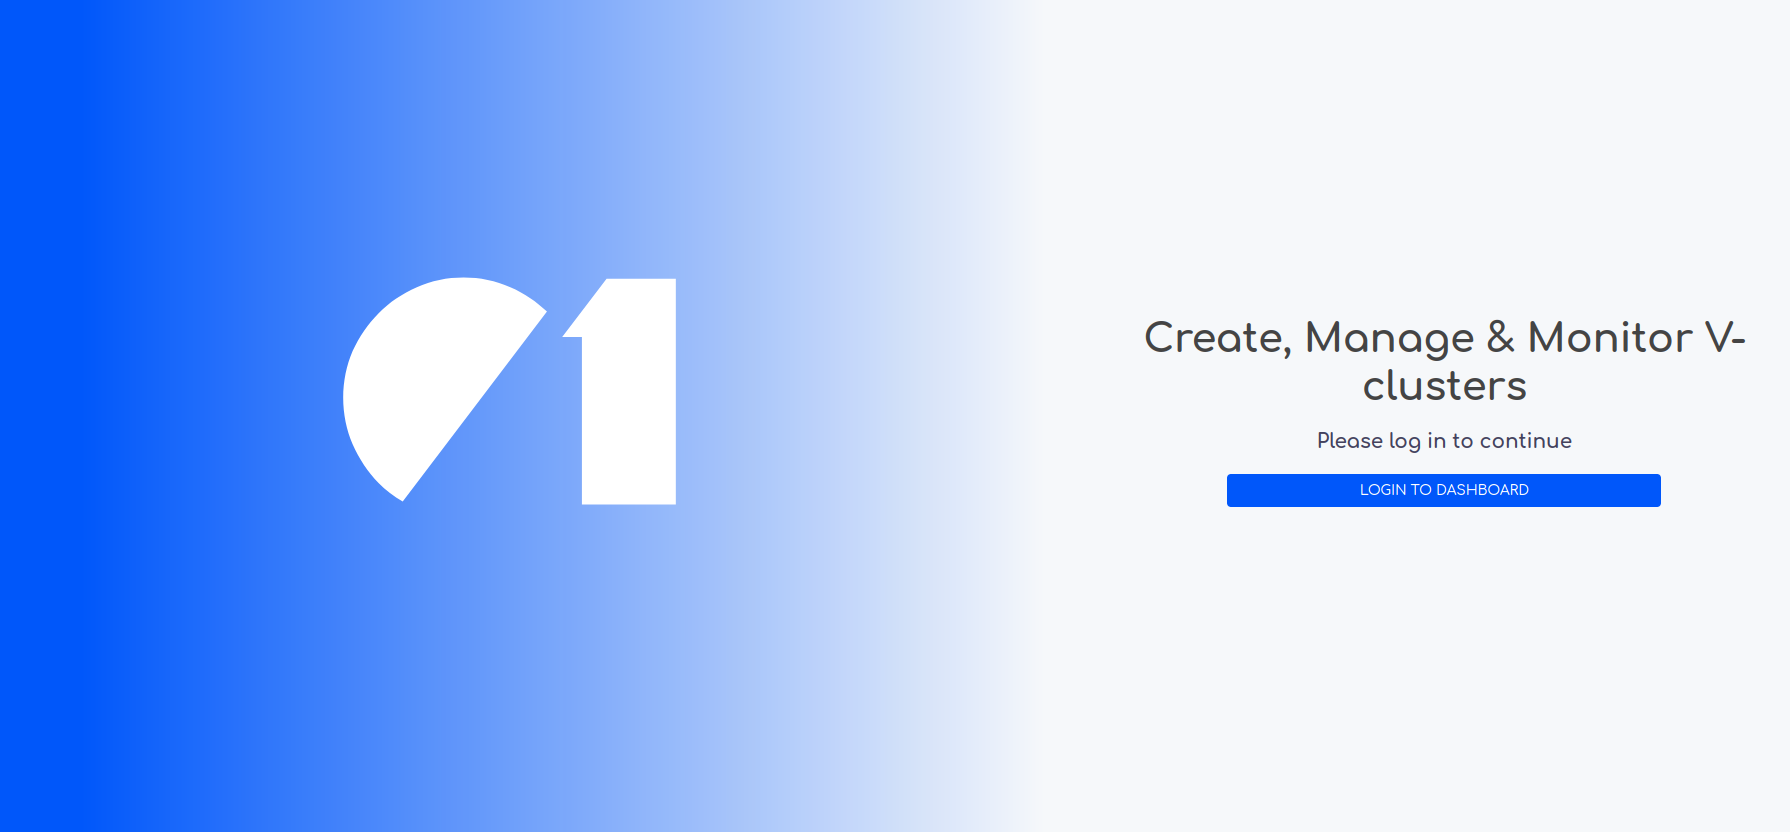
Click on Continue to connect with cluster manager and then click on Login to Dashboard
-
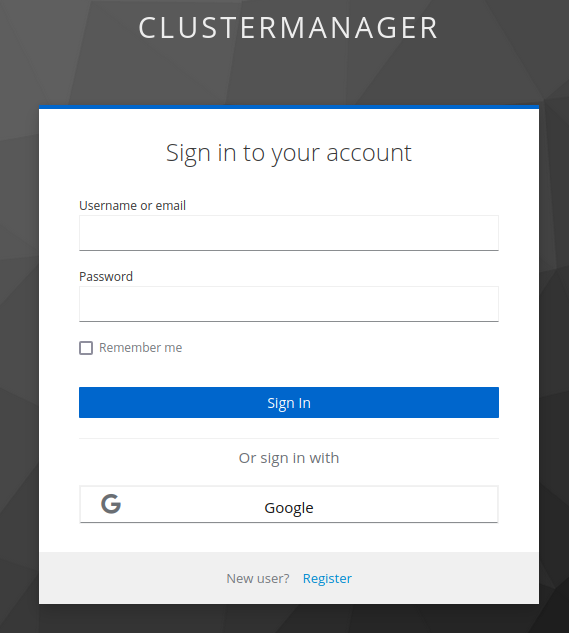
Sign to your cluster manager account with the creadentials using email or username and password
-
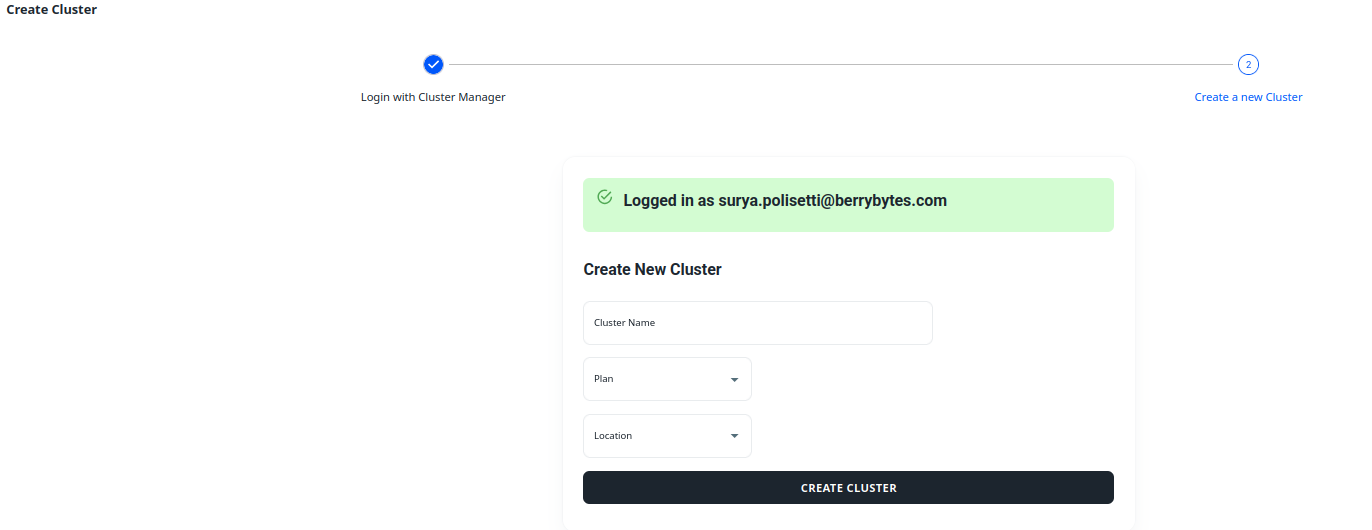
After successful login with cluster manager, provide Cluster Name, Plan and Location and click on Create Cluster.
-
After creating cluster from 01Cloud, you can able see the cluster in the list of clusters

Steps to Import external cluster into the 01Cloud:
-
After logging into 01Cloud account, go to the create project section and click on the Cluster option.

-
After entering into the cluster section, click on Import for importing the cluster.

-
Select provider for importing cluster, 01Cloud provides flexibility to import cluster from various providers like GKE, AWS and Other provider option as well.

-
If the user want to import cluster from AWS provider then provide the information such as Cluster Name, Region where cluster is provisioned and JSON config file for the imported cluster and click on Import.
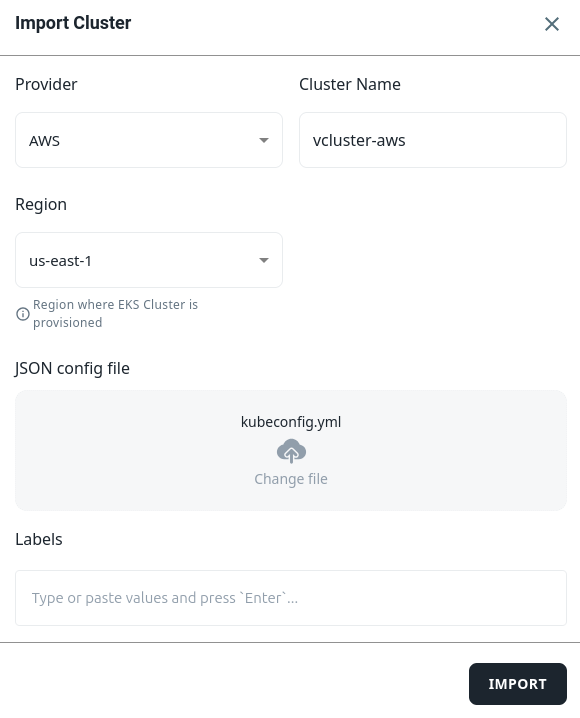
-
Cluster has been imported from the required provider successfully and after this you will be able to see under list of clusters.

Managing DNS
Managing DNS on imported clusters in 01Cloud empowers users to configure domain name resolution settings effectively, enabling seamless access to services deployed on Kubernetes clusters using user-friendly domain names. This enhances accessibility, simplifies management, and improves the overall user experience for accessing applications and services within the 01Cloud platform.
Benefits of Managing DNS on Imported Clusters:
-
User-Friendly Access: DNS management enables users to access services deployed on imported clusters using intuitive and user-friendly domain names.
-
Centralized Management: By managing DNS settings within the 01Cloud platform, users benefit from centralized management and control over DNS configurations for imported clusters.
-
Customization: Users have the flexibility to customize DNS settings according to their specific requirements, such as configuring domain names and DNS records to align with organizational naming conventions.
-
Improved Accessibility: Configuring DNS settings enhances accessibility to services deployed on imported clusters by providing easy-to-remember domain names for users to access applications and services.
How to Apply DNS on Imported Cluster?
-
Click Cluster option of your organization and go through the cluster list.
-
Click on Imported Cluster and you will see the following interface.
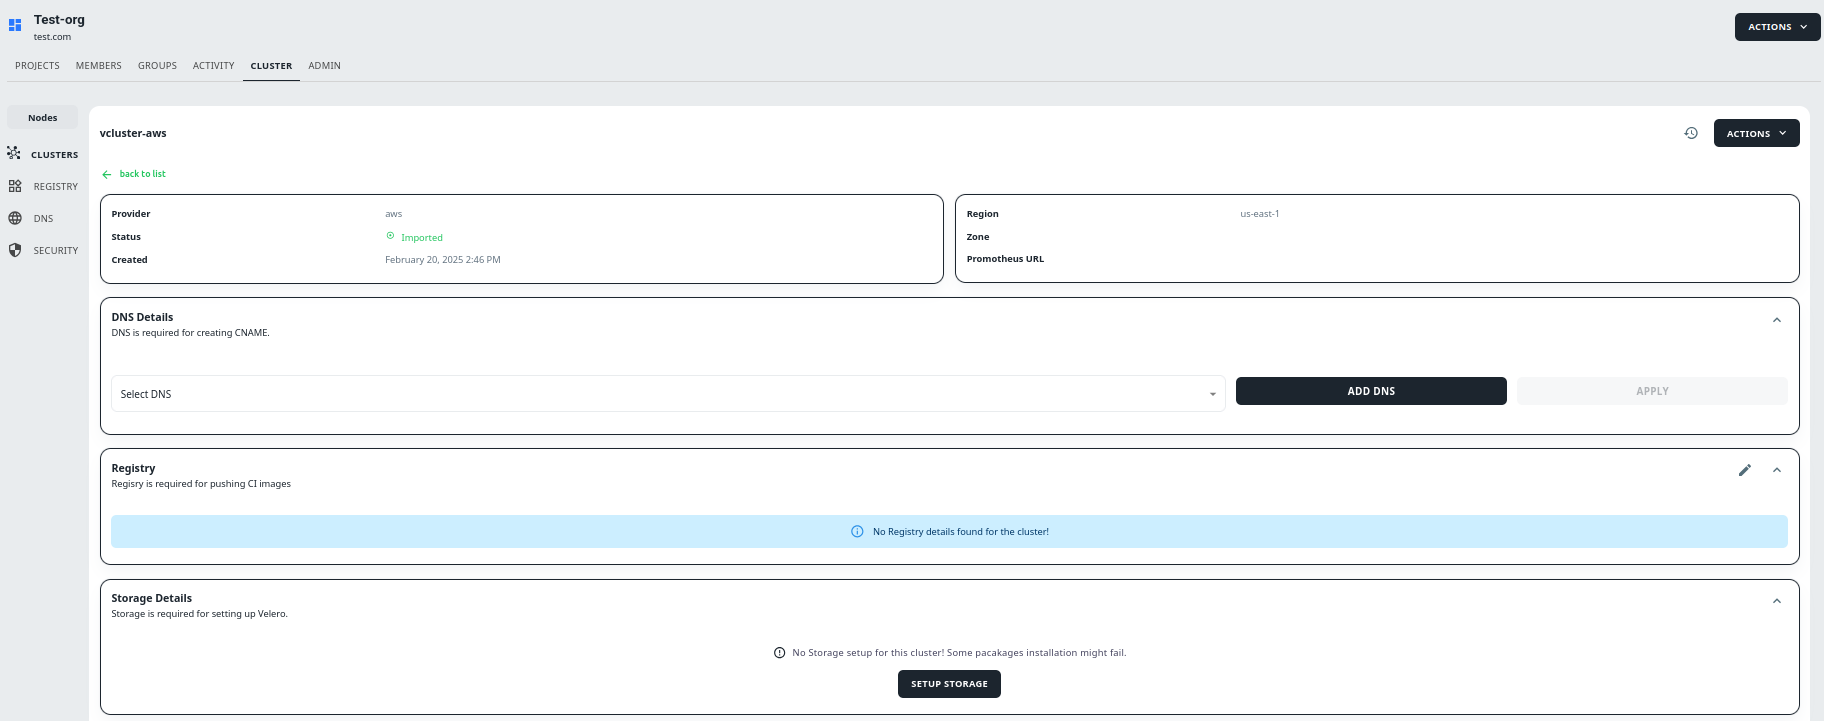
-
Click on DNS Details,after this you will shown the Select DNS Dropdown List of available DNS, from their choose your desired DNS and click Apply.


-
Finally, you are able to apply the DNS.

Registry
Updating the registry on an imported cluster in 01Cloud that allows users to ensure that the cluster pulls container images from the desired registry or repository. By updating the registry configuration, users can seamlessly integrate the imported cluster with different container image sources, ensuring compatibility, security, and reliability of application deployments.
Benefits of Using Registry on Imported Cluster
1. Registry Integration:
- A registry serves as a central repository for storing container images used by Kubernetes clusters for application deployment.
- Updating the registry configuration on an imported cluster involves specifying the registry URL or repository from which the cluster should pull container images.
2. Importance of Updating Registry:
- Updating the registry on an imported cluster is essential for ensuring that the cluster has access to the latest container images and software updates available in the designated registry.
- It allows users to switch to new registries or repositories as needed, ensuring compatibility with evolving infrastructure and deployment requirements.
3. Seamless Integration:
- Updating the registry configuration enables seamless integration of the imported cluster with different container image sources, such as public or private registries, cloud-based repositories, or custom image repositories.
4. Security Considerations:
- Security is a critical consideration when updating the registry on an imported cluster. Users must ensure that the new registry configuration includes appropriate authentication credentials and access controls to prevent unauthorized access to sensitive container images.
5. Compatibility and Reliability:
- Updating the registry ensures compatibility and reliability of application deployments on the imported cluster by ensuring that the cluster pulls container images from a trusted and reliable source.
- It allows users to leverage the latest software updates, security patches, and performance optimizations available in the updated registry.
How to UPDATE Registry on Imported Cluster
-
Go to the create project section and click on the Cluster option.
-
Click on Imported Cluster and you will see the following interface.

-
Click on Registry and this click on Edit Icon on right side,after this you will shown the Select Registry dropdown list of available Registry, from that choose your desired Registry and click UPDATE.
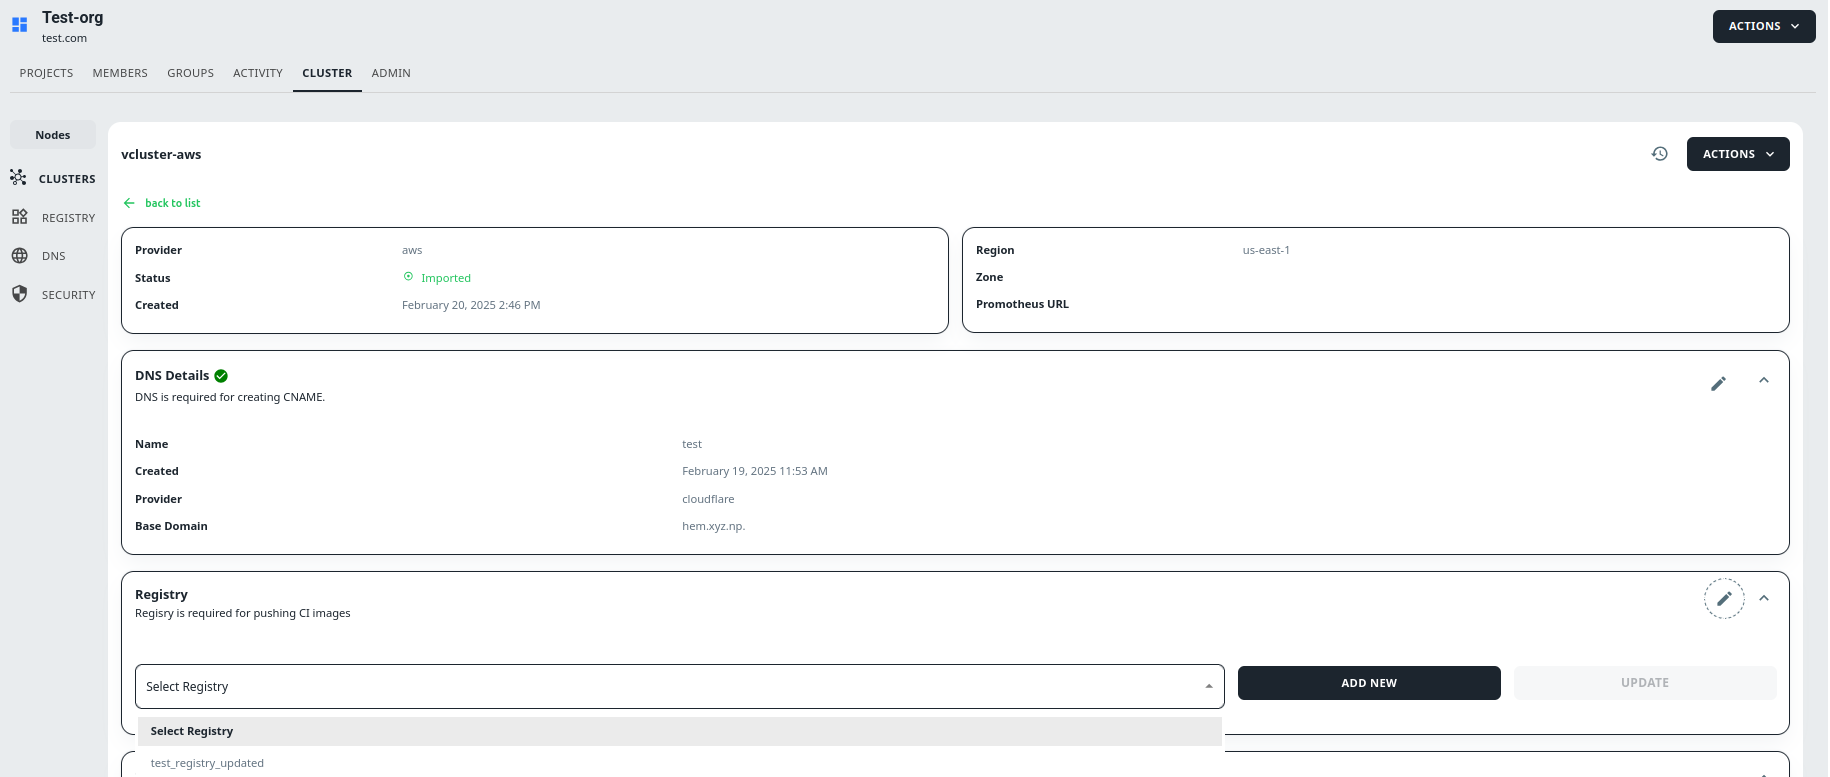
-
Finally, you are able to UPDATE the Registry.
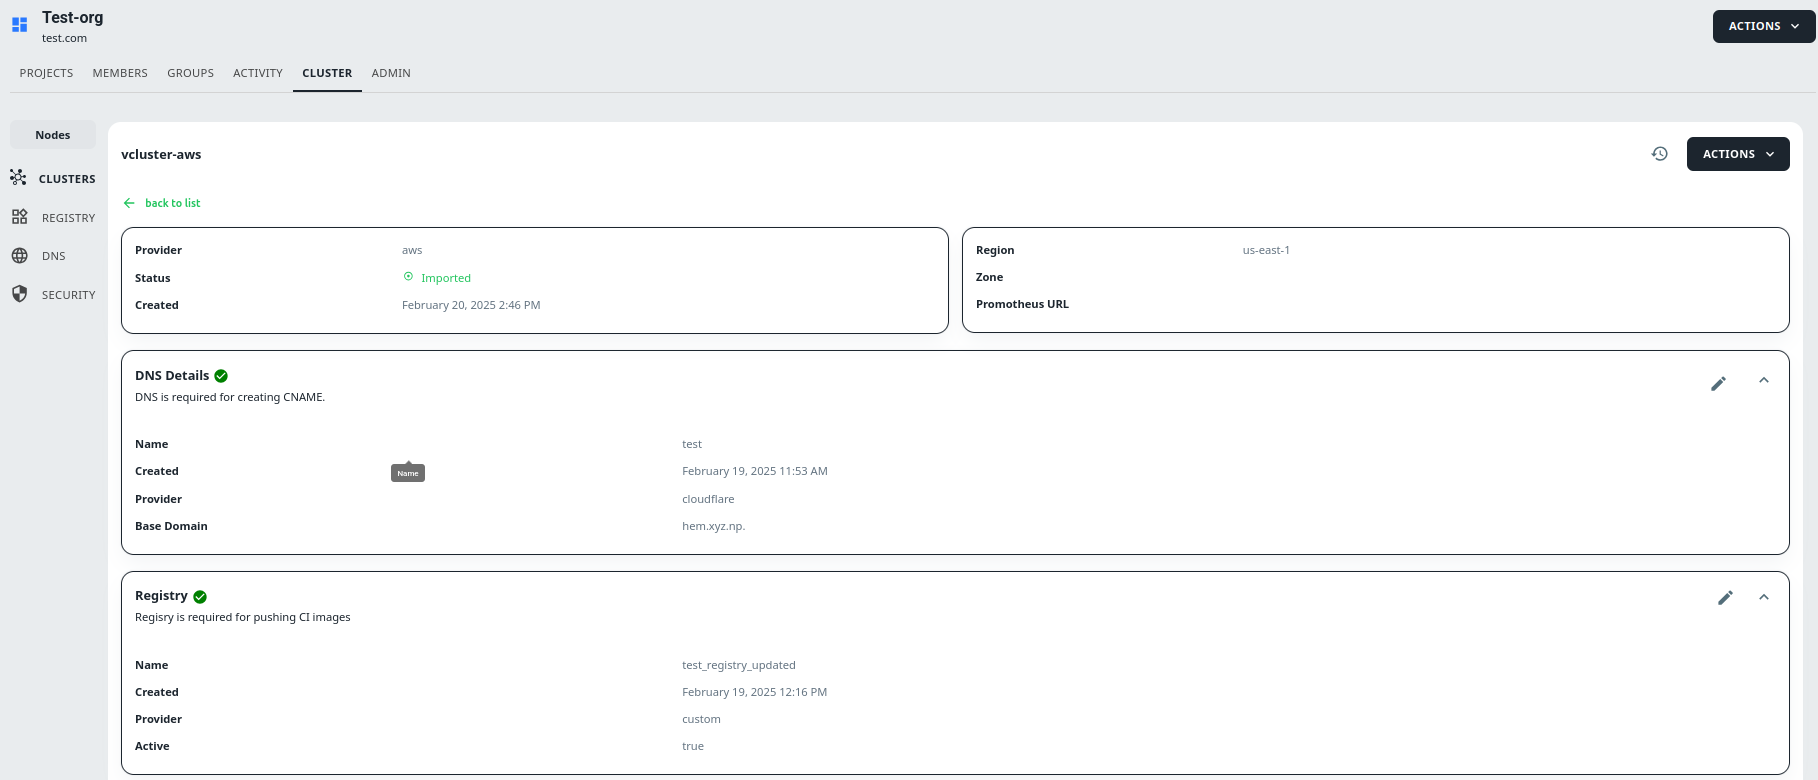
Managing Storage:
Managing storage in 01Cloud aspects ensuring data persistence, availability, and reliability for applications deployed on Kubernetes clusters. By setting up storage resources effectively, users can facilitate data backup, replication, and disaster recovery processes. Here’s an overview of managing storage in 01Cloud:
Overview of Managing Storage in 01Cloud:
1. Storage Setup:
- Before taking backups on an imported cluster, users need to set up storage resources to store backup data securely.
- Storage resources may include block storage volumes, file storage systems, object storage buckets, or cloud-based storage services provided by 01Cloud or external providers.
2. Storage Classes:
- 01Cloud supports the concept of storage classes, which allow users to define different tiers or performance levels for storage resources based on their specific requirements.
- Storage classes provide flexibility in allocating storage resources to applications based on factors such as performance, availability, durability, and cost.
3. Persistent Volume Claims (PVCs):
- Users can request storage resources for their applications using Persistent Volume Claims (PVCs) in Kubernetes.
- PVCs specify the desired storage class, access mode, and storage capacity required by applications, allowing Kubernetes to dynamically provision and manage storage volumes accordingly.
4. Provisioning Storage:
- Once storage classes and PVCs are defined, 01Cloud provisions storage volumes or resources based on the specifications provided.
Note: To take backup on Imported Cluster first we have to setup storage and then only bakcup can be taken.
How to Setup Storage on Imported Cluster Imported Cluster?
-
Go to the create project section and click on the Cluster option.
-
Click on Imported Cluster and you will see the following interface.

-
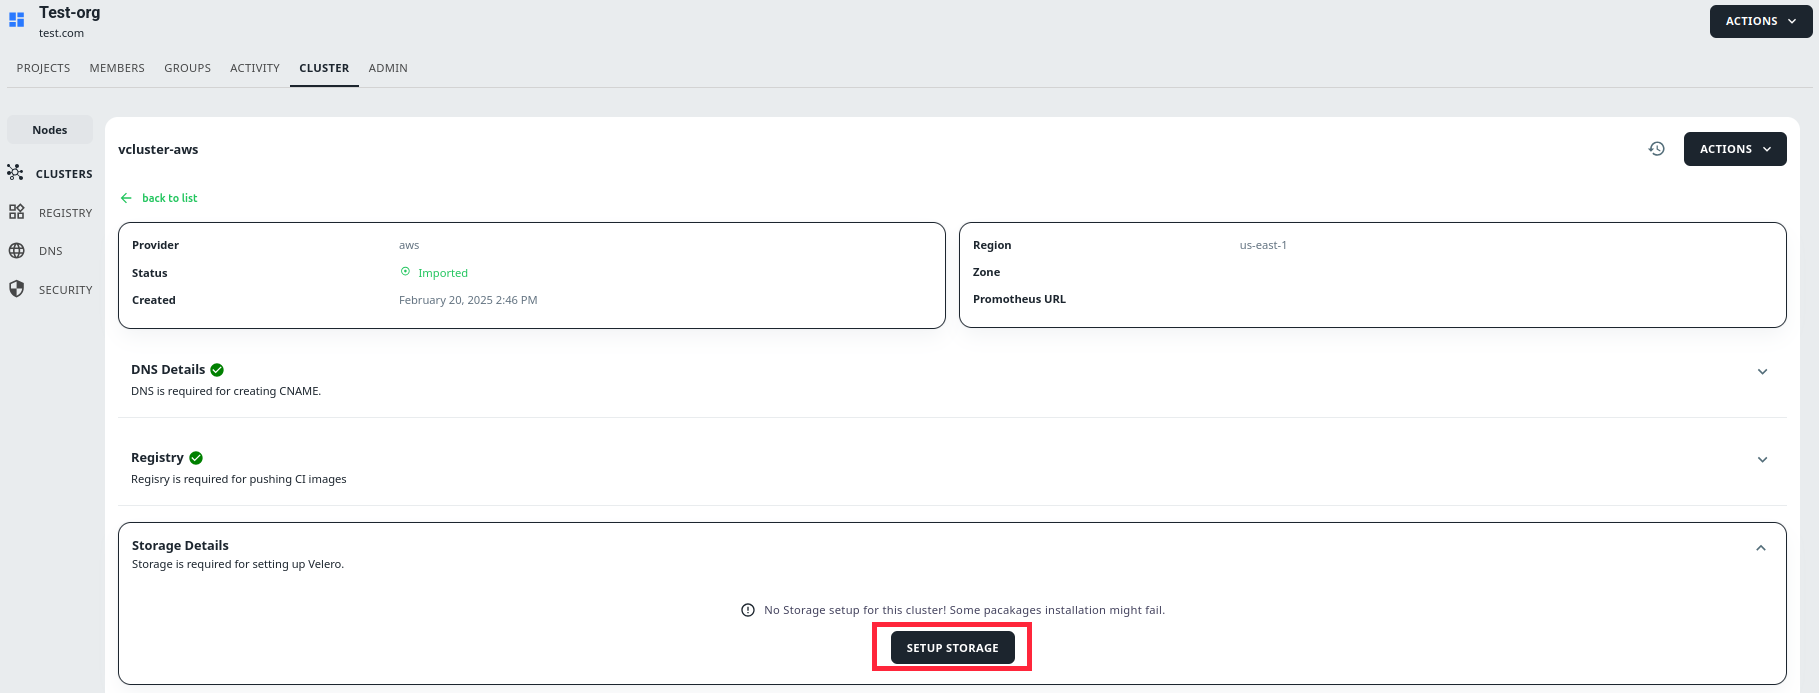
Click on Storage Details.

-
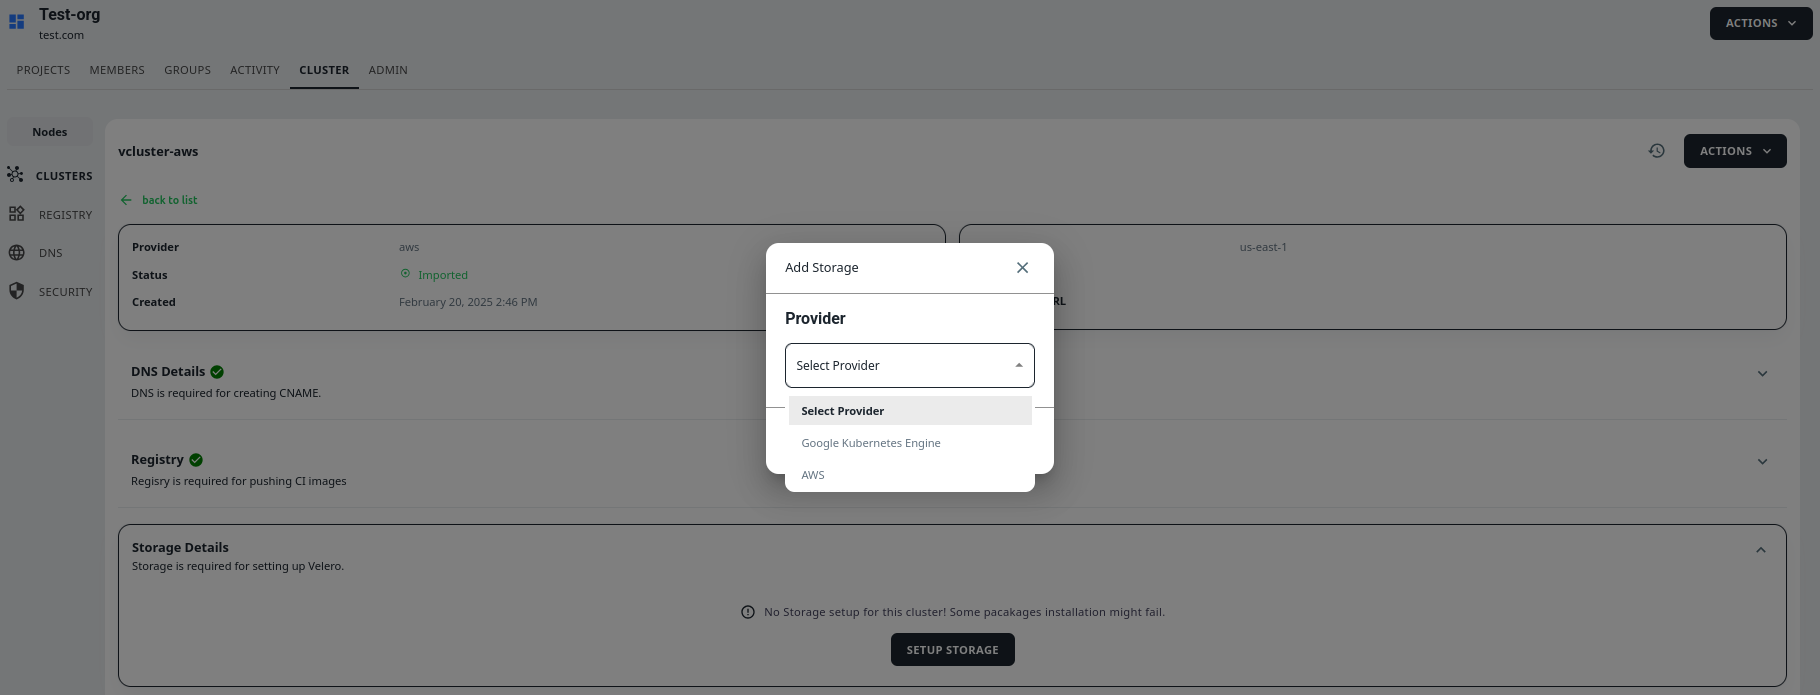
Click on SETUP STORAGE button and select the Provider from Providers Dropdown.
-
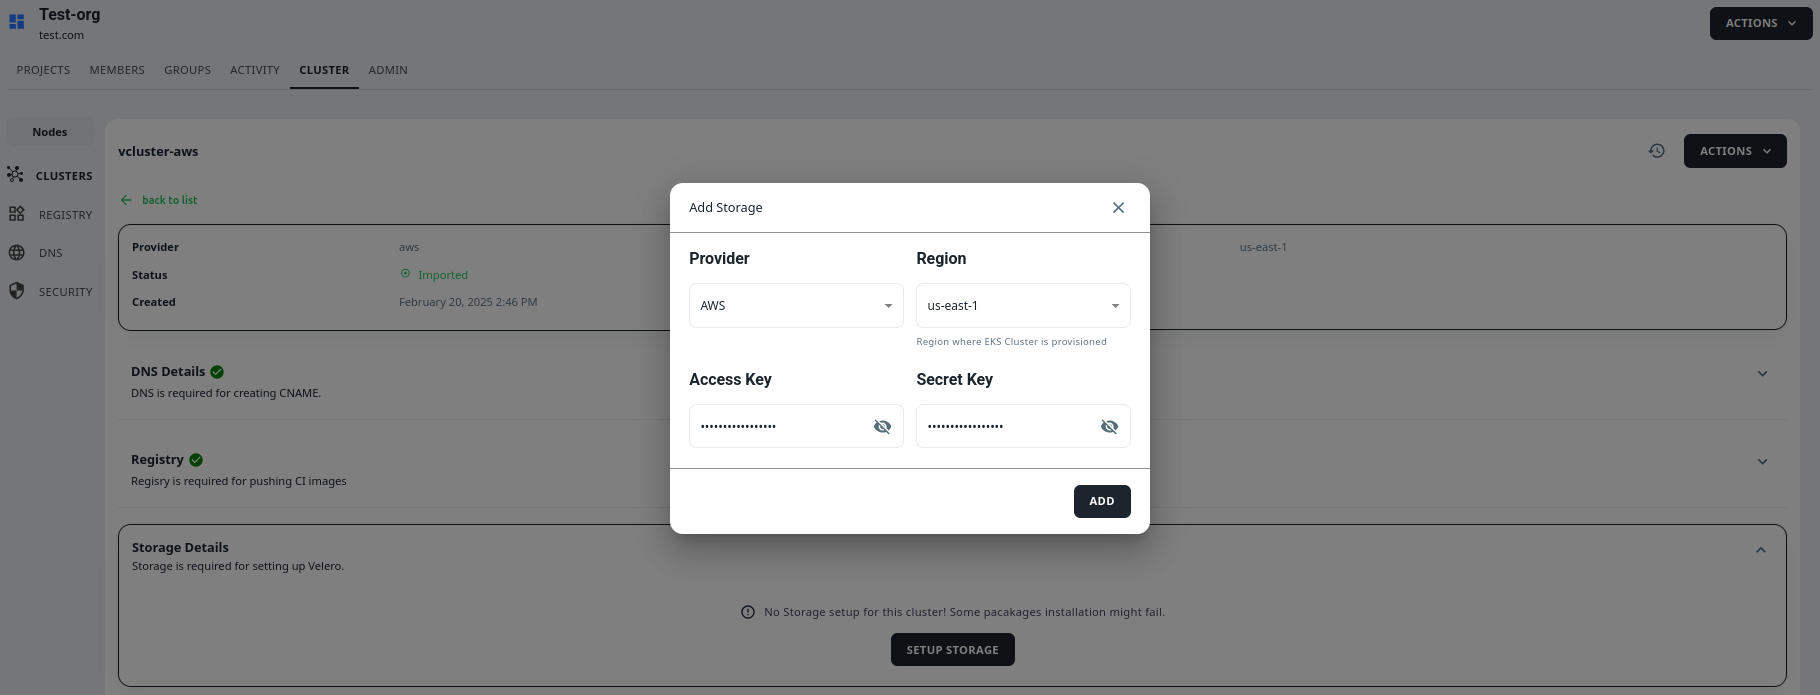
After Selecting the provider fill the required credentials. Here I had select AWS S3 Bucket. For AWS you have to provide Region, Access Key and Secret Key. After providing required credentials Click on Add.
-
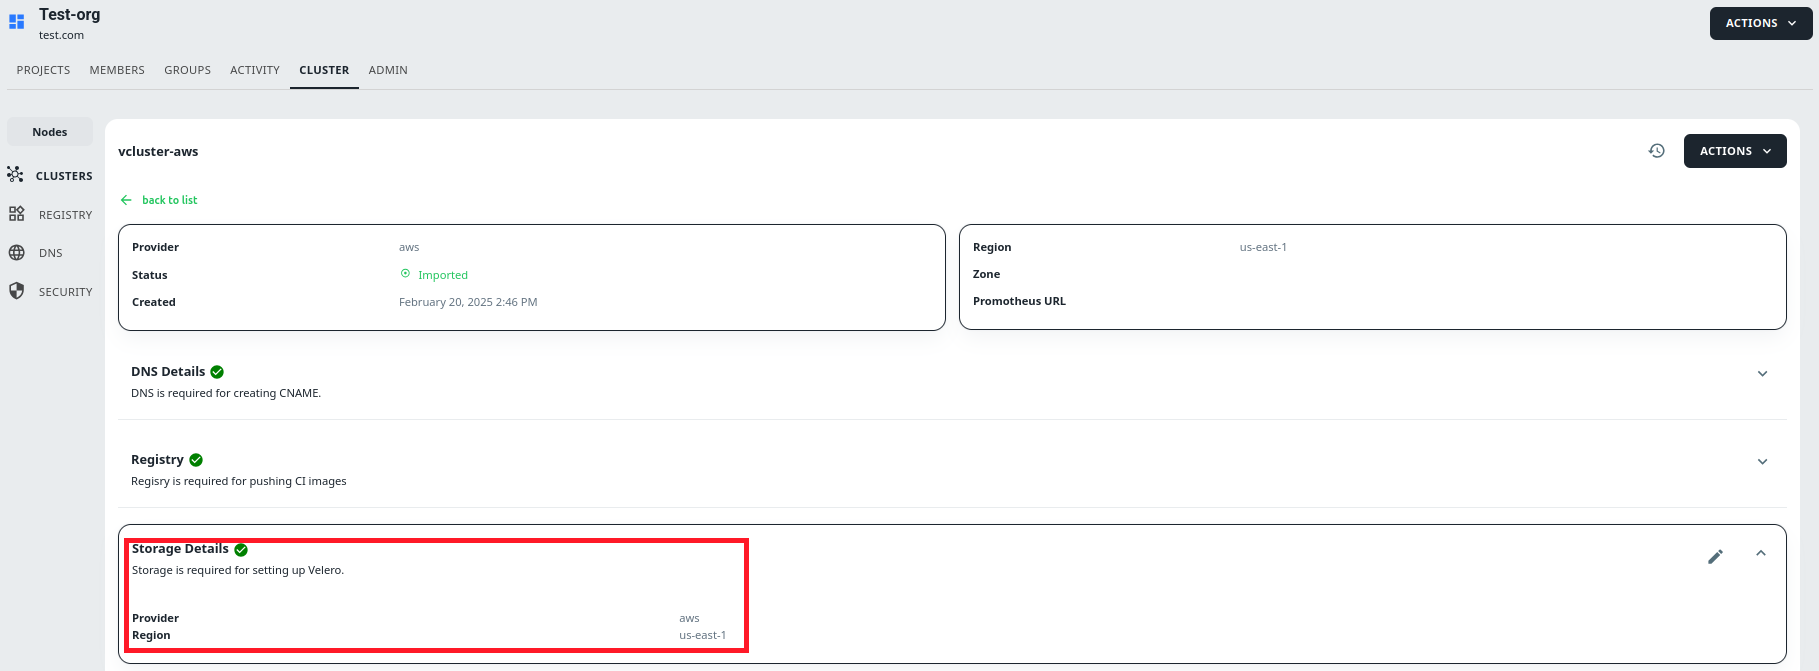
Finally you are able to setup the Storage.
Steps to Setup Backup on Imported Cluster:
To setup the backup you have to setup storage first, for this follow the How to Setup Storage on Imported Cluster. Follow the following steps to setup the Backup.
-
Go to the create project section and click on the Cluster option.
-
To setup backup, user need to setup storage from the below option.

-
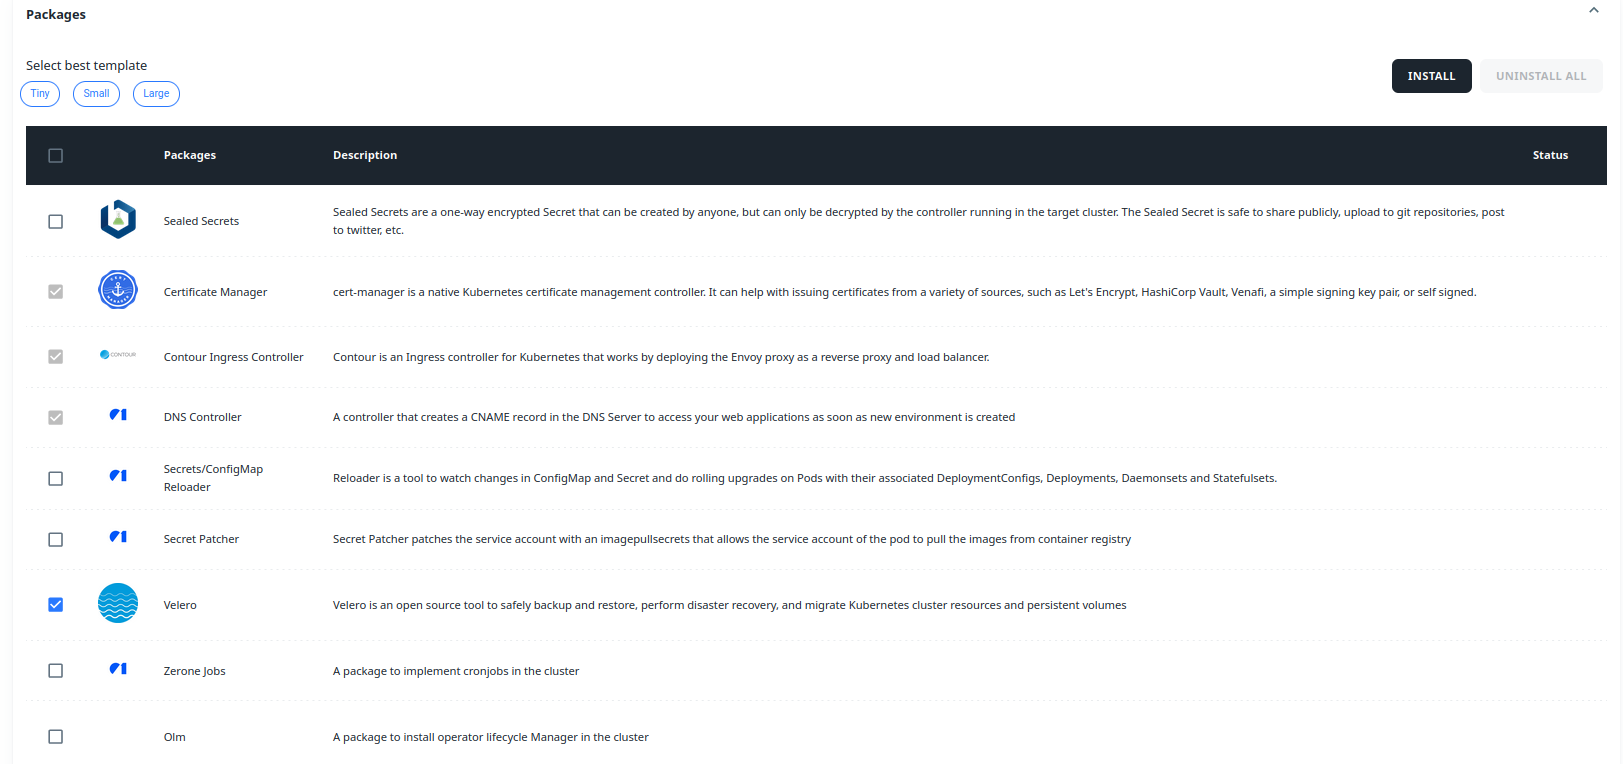
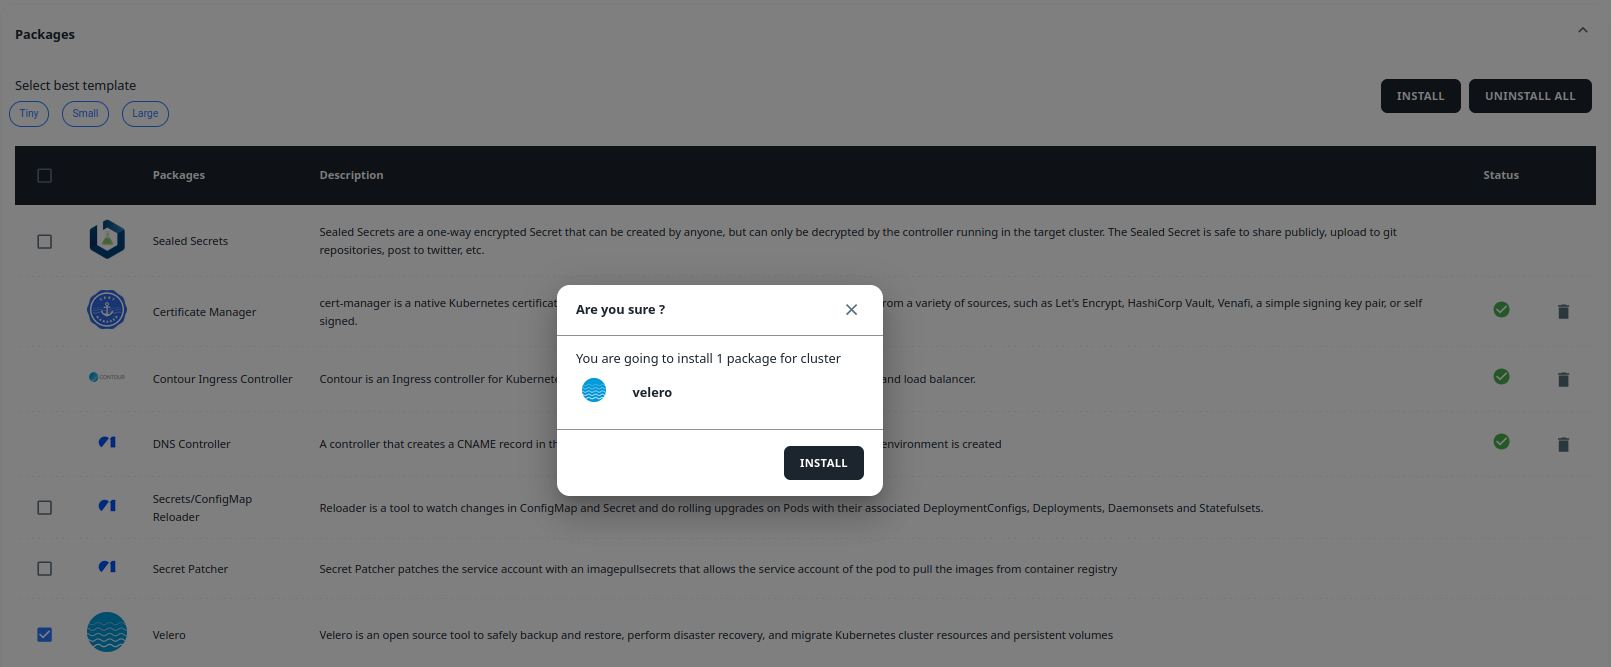
Click on Packages tab and install the Velero Package on your cluster. For package installtion follow the package installation steps here.
-
After sucesfully installation of Velero package to go into your environment and click on BACKUP tab.

-
Click on CREATE SNAPSHOT button, enter snapshot Remarks and Click YES to take the snapshot of your environment.

-
Finally you are able to create the backup.
Install Package:
The Packages can be installed only after the cluster is active and DNS has been added. The following are the list of packages that are available in 01Cloud.
- Sealed Secrets
- Certificate Manager
- Contour Ingress Controller
- DNS Controller
- LoadBalancer Controller
- Secrets/ConfigMap Reloader
- Secret Patcher
- Velero
- Zerone Jobs
- Olm
- Tekton
- Prometheus
Among which, Certificate Manager, Contour Ingress Controller, DNS Controller, LoadBalancer Controller and Prometheus are the default packages that need to be installed.
Steps to Install Packages:
-
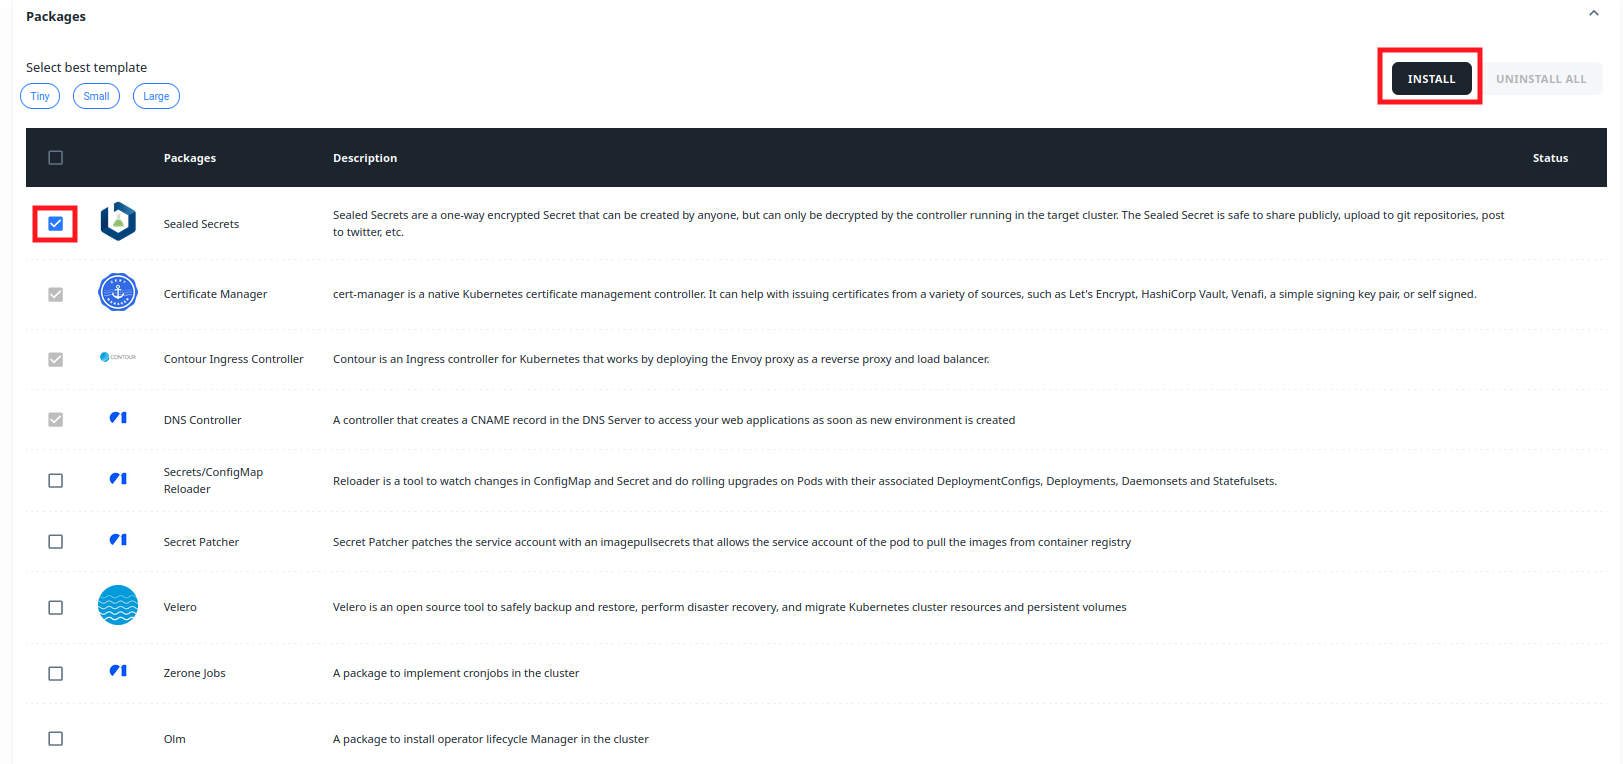
To install the Packages, select the required package and click on Install.
-
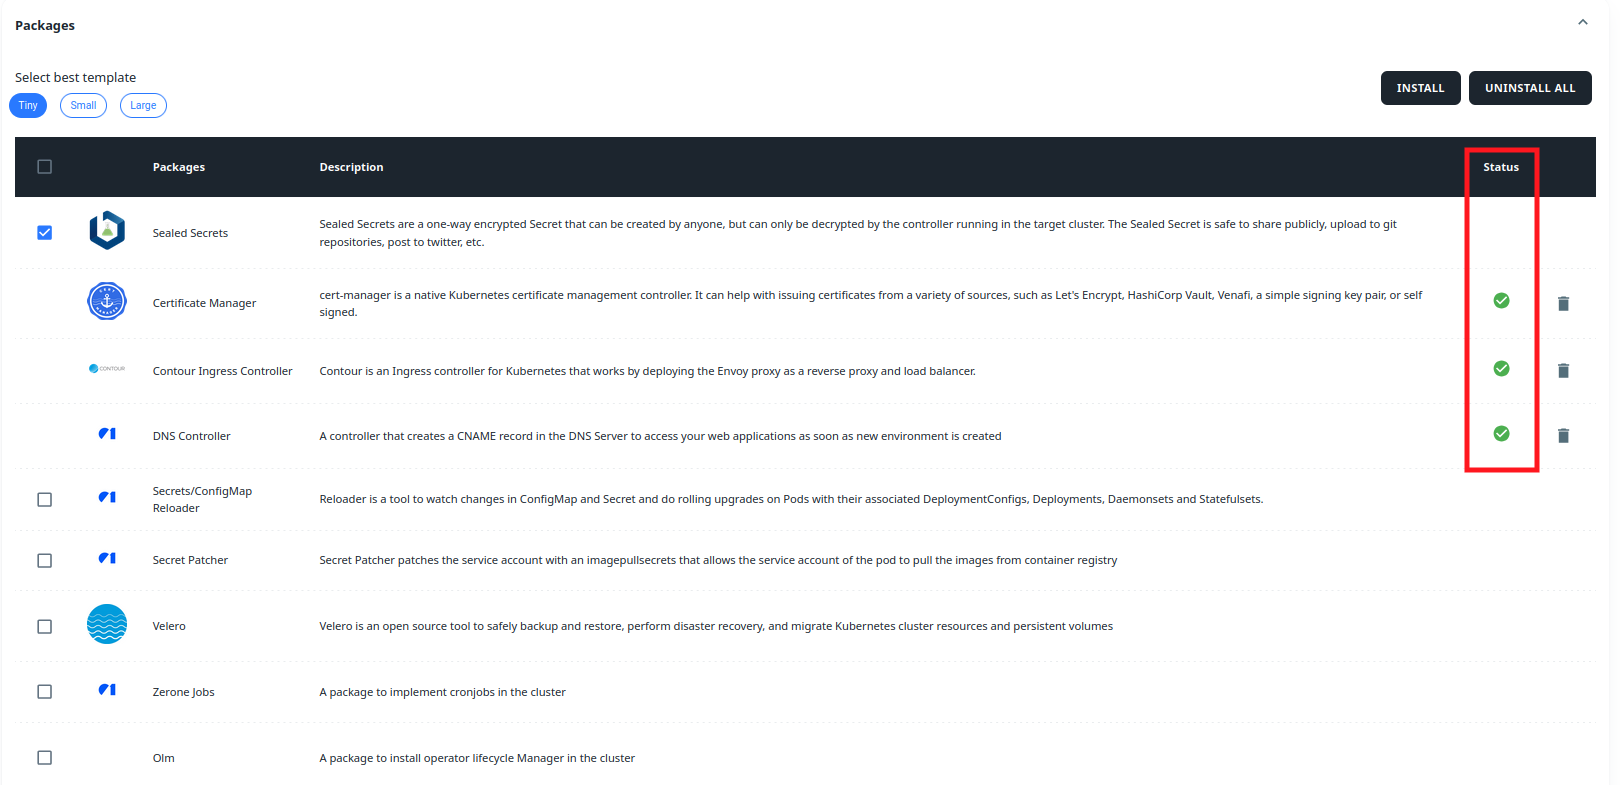
After the packages are sucessfully installed, we can see the status of the installed packages as Active represented by Green Check Marks.
-
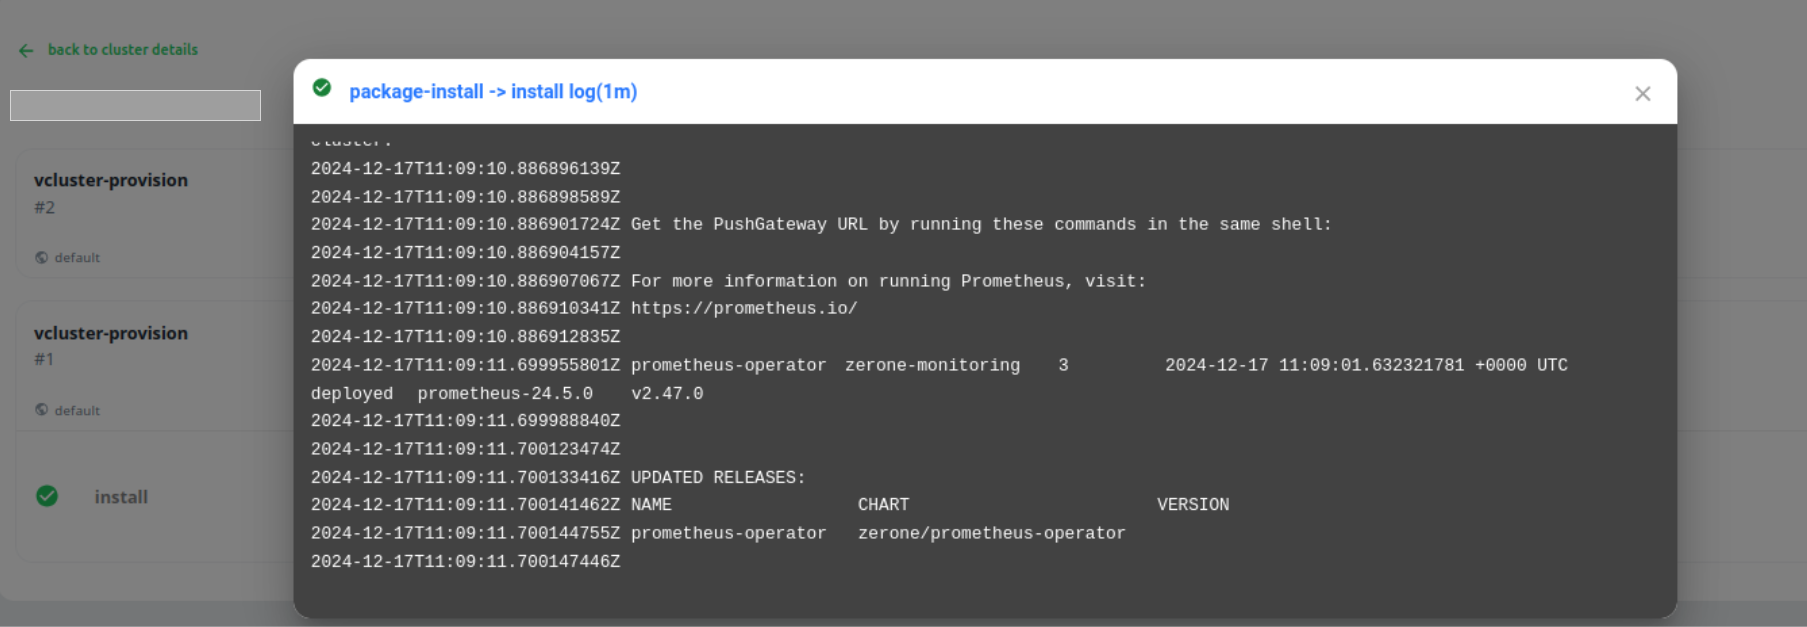
We can also see if the packages have been successfully installed from the logs.
-
The packages can also be uninstalled by clicking on the Uninstall All Button.

-
Specific packages can be uninstalled by clicking on the Trashcan Icon as shown in the screenshot below.

Managing Olm Package:
The Operator Lifecycle Manager (OLM) extends Kubernetes to provide a declarative way to install, manage, and upgrade Operators on a cluster. In order to install Operators in 01Cloud, we need OLM Packages which can be installed from the Package section.
-
Install the OLM Package from the Package section.

-
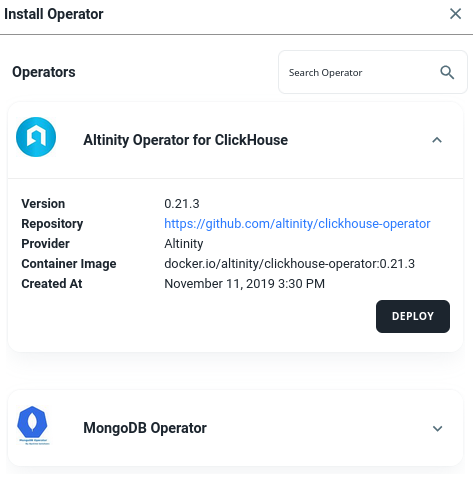
Once the OLM Package is installed, we can deploy Operators from the Operator Section. Go to the Operators section and click on the “+” sign.**

-
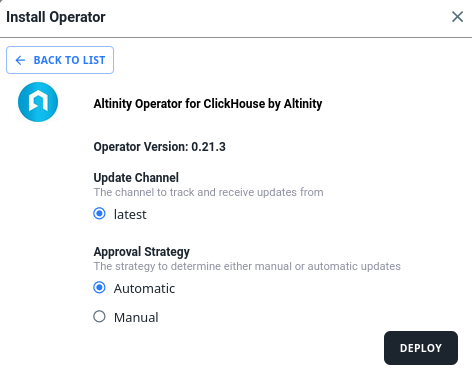
Select the required Operator and click on Deploy button.
-
We can check the progress of the deployment as shown in the screenshot below. The Red, Green and Yellow colors below the card shows failed, successful and In progress status of the deployment.

Cluster Scan:
In 01cloud, cluster scanning is a security feature designed to identify vulnerabilities, misconfigurations, and compliance issues within your Kubernetes clusters. This feature becomes accessible once you create a virtual cluster (vCluster) using 01cloud, either by creating a new cluster directly or importing an existing one.
Types of Cluster Scanning in 01cloud:
trvi_sbom:
-
This scan analyzes all container images and dependencies within the cluster to generate an SBOM—a comprehensive list of all software components. It identifies and flags vulnerable software libraries and outdated packages in each container image.
-
SBOM scanning helps track potential risks in third-party software components and ensures transparency in the software supply chain.
trivy_compliance:
-
The trivy_compliance scan checks for compliance with security best practices and standards, assessing whether your cluster aligns with industry benchmarks such as CIS (Center for Internet Security) standards.
-
This scan highlights configuration issues that could lead to security risks, such as improper role permissions, insecure network settings, or lack of encryption, helping teams meet compliance requirements.
kubescape:
-
Kubescape is designed specifically for Kubernetes security posture assessment. It evaluates the security of the cluster based on Kubernetes-native configurations, identifying security weaknesses in RBAC policies, network policies, workload configurations, and more.
-
It can identify misconfigurations unique to Kubernetes and provides insights to harden the security posture of the cluster against potential exploits.
Steps to Perform Cluster Scan in 01Cloud:
-
Start by creating a new Kubernetes cluster in 01Cloud or importing an existing one from Cluster tab in 01Cloud.

-
Once your cluster is created or imported, under the Cluster tab select Security option.

-
Select the Cluster which you want to scan and Click on RUN SCAN.

-
Choose the scan type based on the requirement.

-
After selecting the scan type as trviy_sbom, click on Yes.

-
01cloud will run the chosen security check on the cluster, analyzing configurations, dependencies, and settings.

-
Once the scan completes, review the detailed report after cluster scan. The report will highlight any vulnerabilities, misconfigurations, or compliance issues identified.

