This article aims to provide a comprehensive guide on how to create an environment in 01Cloud. It is important to note that there are three different types of environments available in 01Cloud, namely custom, template, and container registry. Although the steps involved in creating these environments are similar, it’s worth noting that some custom installation options may not be available for template and container registry environments.
We’ll walk you through each step of the process to ensure that you have a clear understanding of how to create an environment in 01Cloud.
Custom Environment Creation:
Step 1: Access the Application:
From the front page of the application, click the CREATE ENVIRONMENT button to begin the environment creation process.

Step 2: Select the Environment Version:
On the next page, you will be prompted to choose the version of the environment you wish to create and click CONTINUE button.
Note: Environment Version can only be selected for Template and Custom Environment.
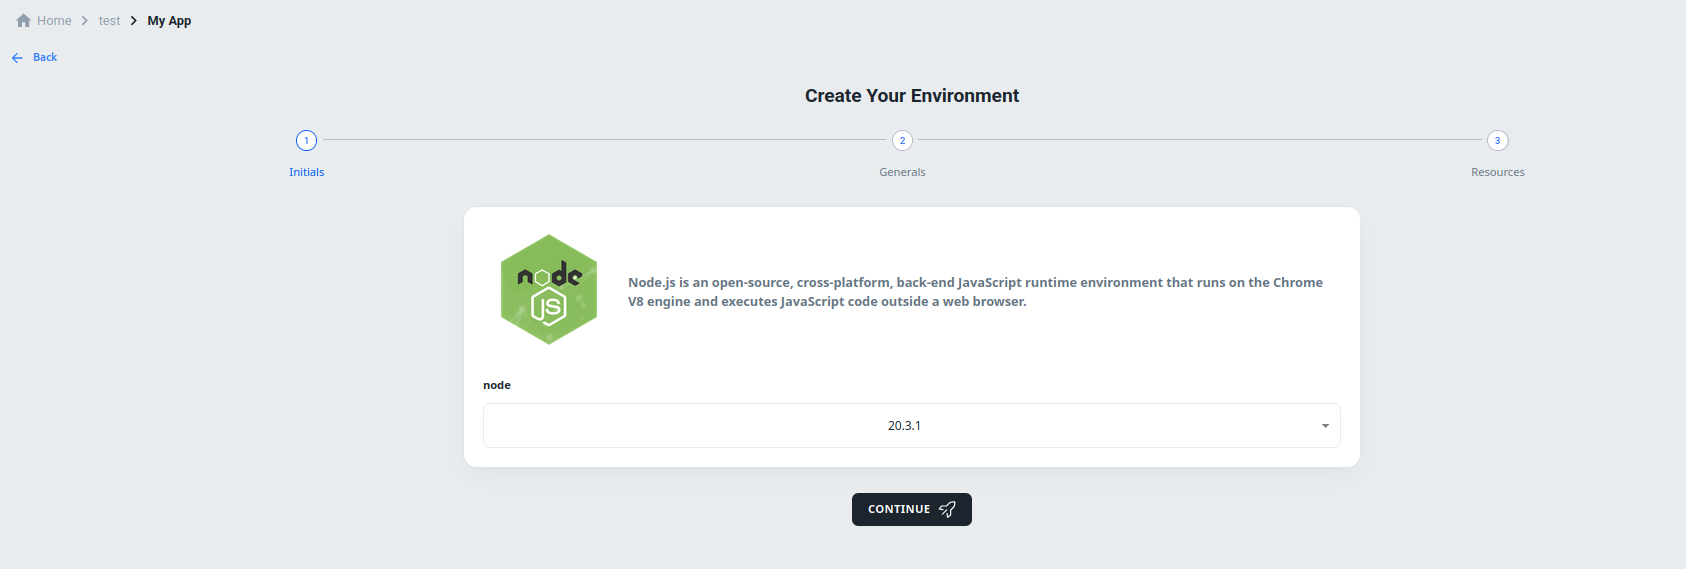
Step 3: Choose Quick or Custom Installation:
You will have two options: Quick Installation and Custom Installation. If you choose Quick Installation, all fields will be set to default values during the environment creation process.

If you choose Custom Installation, you will have various options for customizing the environment.

Note: Environment Variables, Deployment Strategy, Scripts and Startup Job Options are only available for Custom and Container Registry Environment. Triggers Option is only available for Custom environment.
Step 4: Customize the Environment:
There are several options available for customizing your environment, including:
-
System Constants:
In 01Cloud, system constants are predefined configurations that establish operational parameters for the cloud environment, ensuring consistency, security, and scalability. These constants include settings like port number range.

-
System Variables:
System variables are used by the environment to run the system. You can add system variables in the environment creation process.

-
Environment Variables:
Environment variables are used to pass configuration parameters to containers and provide information about the environment in which the containers are running. They also allow for secure management of sensitive information.

When you click the ADD VARIABLE button, you can add a user variable and value to set the environment variable. There is also a “Secret” checkbox that, when checked, stores the environment variable as a secret.

-
External Secrets:
The External Secrets tab allows you to access the external secret feature, which allows you to use secrets from external secret providers (e.g. AWS, HashiCorp, GCP) in 01Cloud environments.
You can learn more about the external secret feature in this article: External Secret feature in 01Cloud .

-
CI Variables:
In 01Cloud, the CI Variables option during the environment creation process allows users to define custom configuration settings for their Continuous Integration (CI) workflows. These variables act as key-value pairs that can store sensitive data, environment-specific settings, or other dynamic values needed for application builds or deployments. Users can add variables individually through the Add Variable option or manage multiple variables simultaneously using the Bulk Edit feature, which is ideal for quickly importing or modifying a large set of variables. These variables streamline the CI process by ensuring flexibility, security, and efficiency in managing build and deployment parameters.

-
Triggers:
The Triggers section provides three available options, as depicted in the following illustration:

- Prevent build on create: This option allows users to add the necessary add-ons and configurations to the environment without triggering the CI/CD process. They can manually initiate the CI/CD process from the CI/CD tab.
- Push: This option automatically triggers the CI/CD process when code is pushed into the branch from which the environment is built.
- Tag: This option automatically triggers the CI/CD process when code is tagged for release.
-
Deployment Strategy:
Deployment strategies refer to the methods used to release new versions of software into production environments. There are several deployment strategies available in 01Cloud that organizations can use depending on their needs and requirements.
-
AB-Testing Deployment Strategy

In this strategy, a small portion of users are redirected to the new version of the software while the rest of the users continue to use the old version. This allows organizations to test the new version before releasing it to all users.
-
Blue-Green Deployment Strategy

In this strategy, two identical production environments are created, one for the current version of the software (blue) and one for the new version (green). When the new version is ready, all traffic is redirected to the green environment, and the blue environment becomes the backup. This approach minimizes downtime and allows for easy rollback in case of issues.
-
Canary Deployment Strategy

In this strategy, a small portion of users are redirected to the new version of the software, similar to AB-Testing. The difference is that in this approach, the new version is deployed to a limited number of servers, rather than a limited number of users.
-
Rolling Update

In this strategy, the new version of the software is gradually rolled out to the servers, one at a time. This allows organizations to deploy new features without causing downtime or disrupting users. The update process is typically automated, and rollback is possible if issues are detected.
-
-
Startup Job:
The Startup Job creates an initialization container that is executed before the entire environment. You can specify the name of the job, along with the image options such as Alpine or Busybox, and specify the code you wish to run as a startup job prior to launching your environment.

-
External Logger:
The option to enable an external logger is also available, giving you the capability to store the logs of your environment in any external logging service provider. Currently, 01Cloud supports S3, Cloudwatch, Elastic, Loki, Kafka, and GCP.
You can explore more about external logging feature in here .

Step 5: Continuing the Environment Creation Process:
After customizing your environment, continue with the environment creation process by clicking the CONTINUE button.

Step 6: Providing Environment Details:
Now provide a name for the environment. The default name is development and you can select the branch of your code you want to create the environment for. You can also select the amount of resources you want your environment to use.
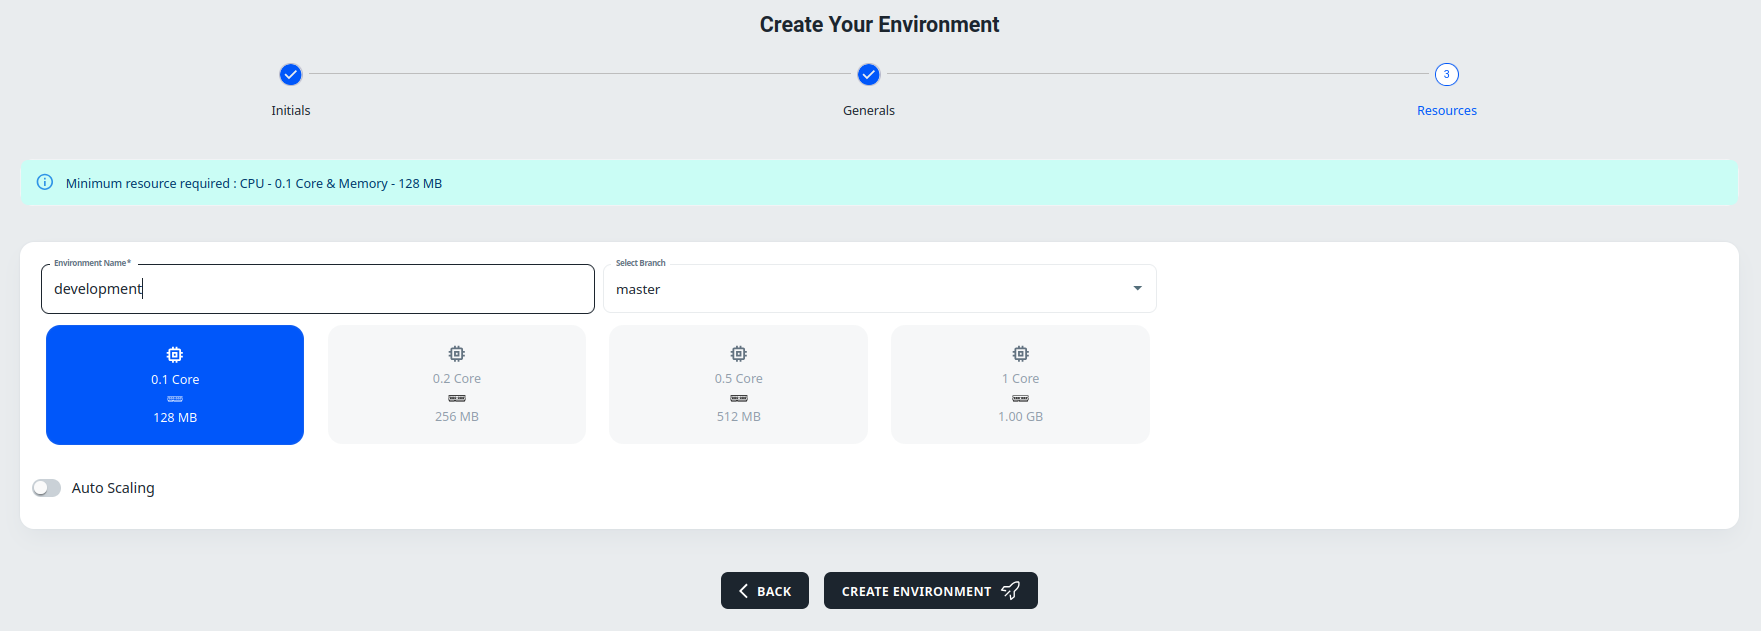
Step 7: Configuring Auto Scaling:
If auto scaling is enabled, you will be presented with auto scaling options. You can set the maximum and minimum replicas for your environment and specify the CPU and memory usage of the environment.
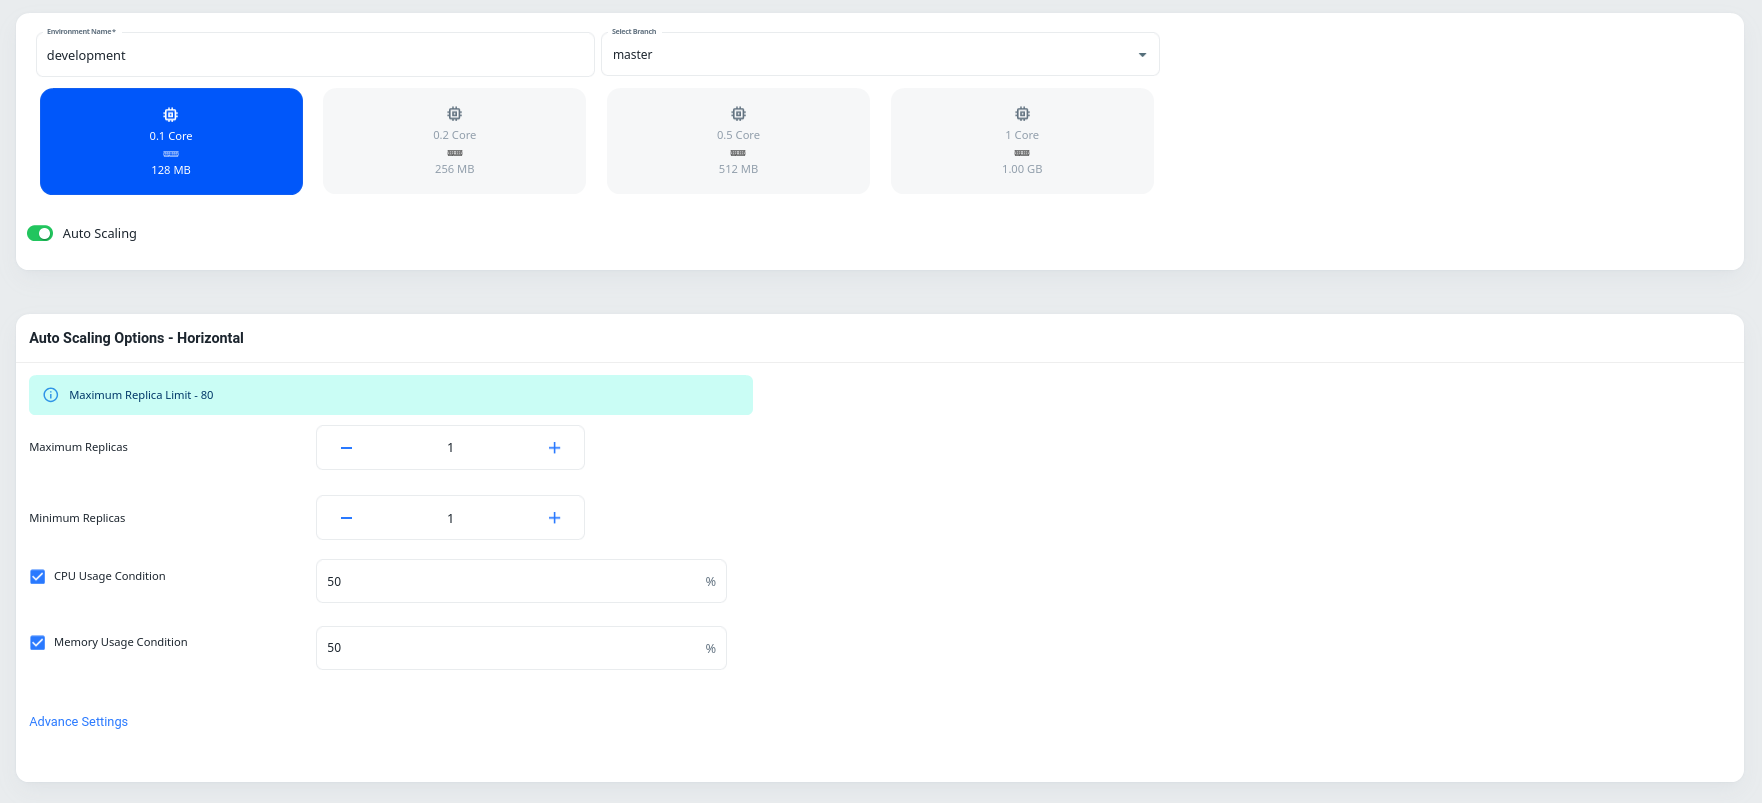
In the advanced settings, there are two columns: Scale Up and Scale Down. Scale Up adds replicas and Scale Down decreases replicas. The advanced settings include:

-
Average Usage Interval: Scales up or down the replicas if the usage threshold is reached for the defined amount of time.
-
Change by: Specifies the number of replicas to add or remove while scaling your environment.
-
Average Change Interval: Specifies the average time between adjustments made to the number of replicas in a deployment to match changes in demand.
There is an option to enable Advanced Scheduling in 01Cloud which empowers users to configure various parameters and policies that influence how Kubernetes schedules pods onto nodes within a cluster. By leveraging advanced scheduling capabilities, users can ensure that workloads are deployed and managed according to specific requirements, constraints, and preferences.
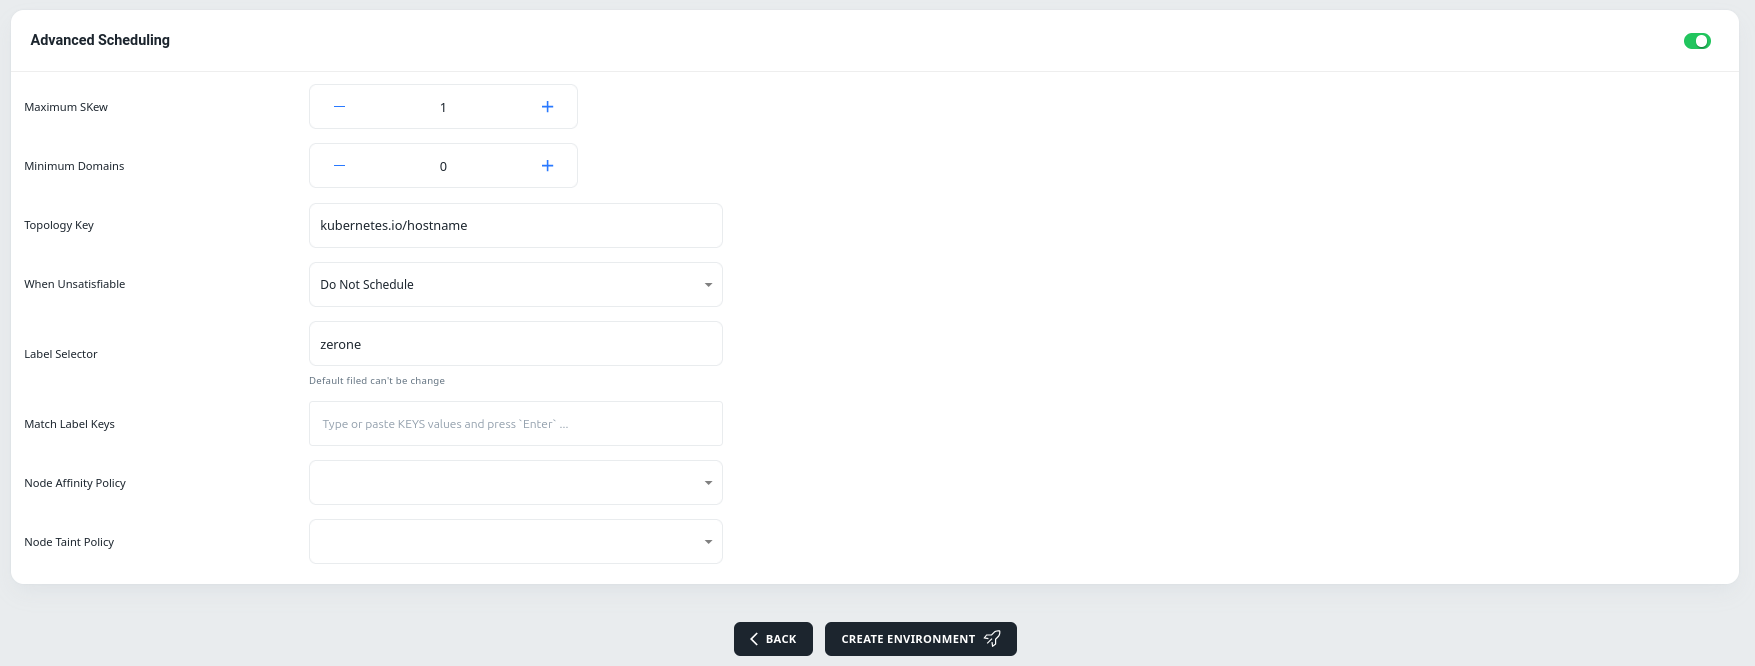
Step 8: Initiating Environment Creation:
Click the CREATE ENVIRONMENT button to start the environment creation process.
Step 9: CI/CD Tab:
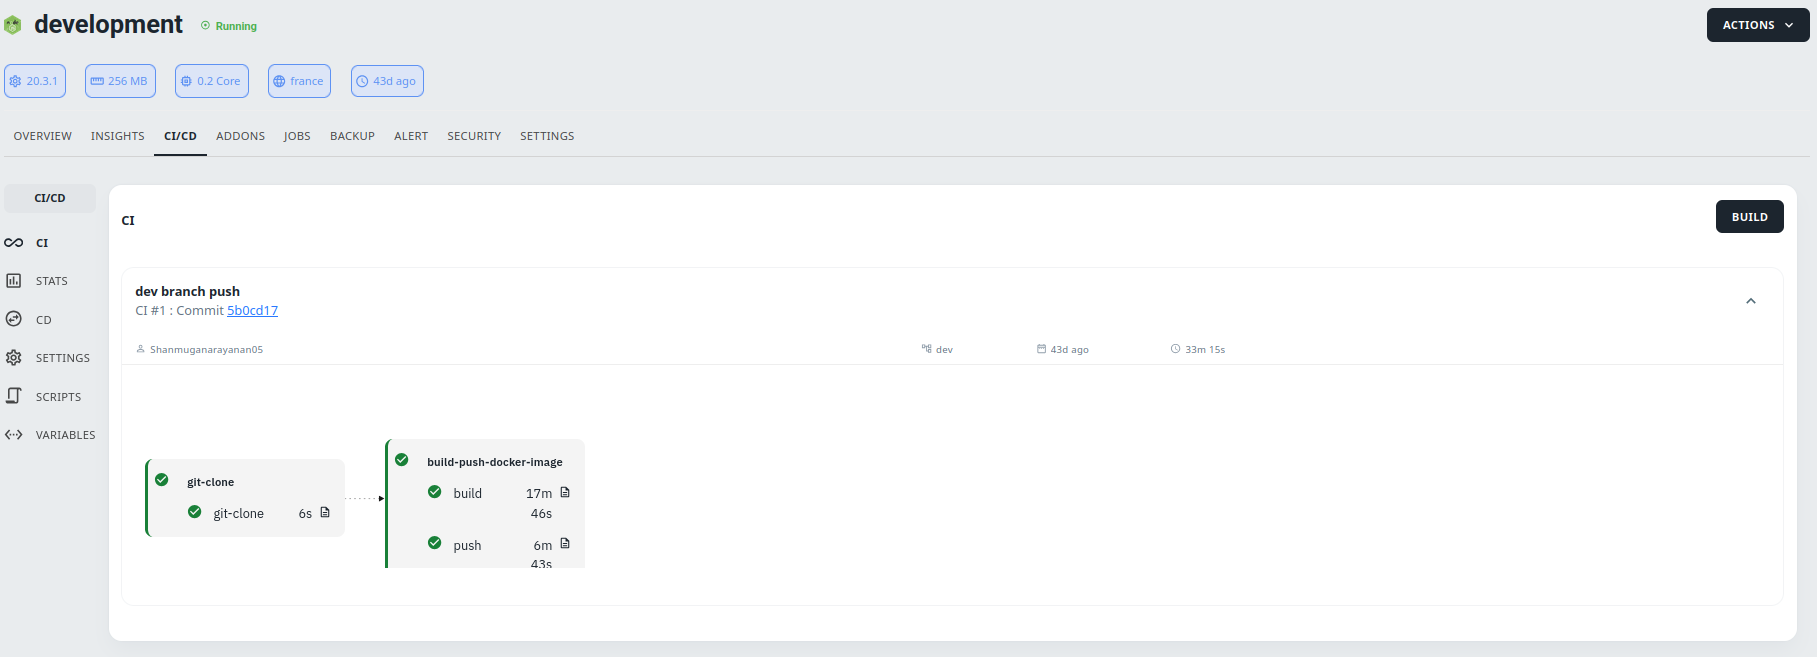
At first, you will be directed to the CI/CD tab inside the environment where the CI/CD process will be completed.
Note: You will be directed to the CI/CD tab only in Custom environment.

Step 10: CI/CD Completion:
After the completion of the CI/CD process, the environment status will change from Pending to Deploying.
Note: Only in Custom Environment.
Step 11: Overview Tab:
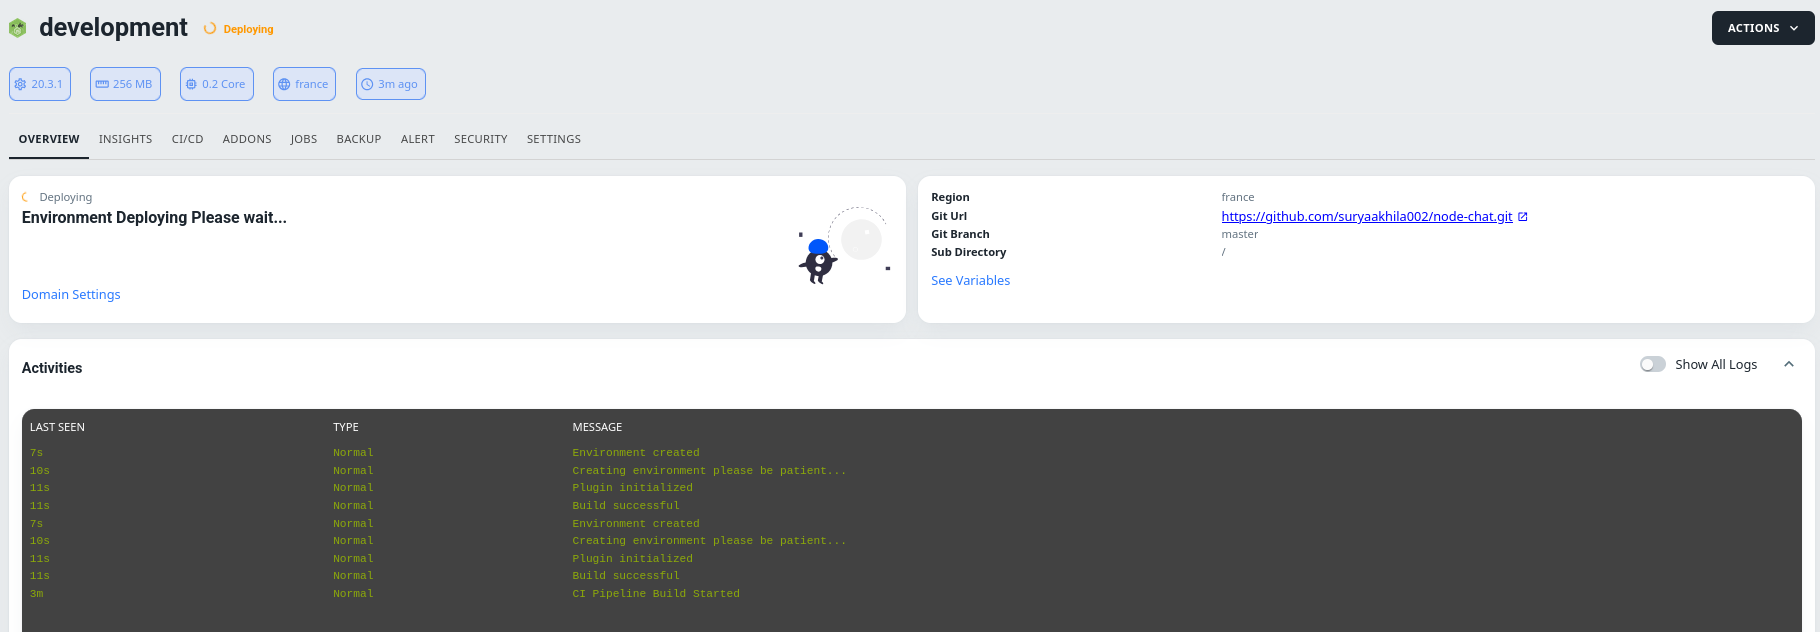
You can view the activity log and other basic environment status in the Overview Tab.
Step 12: Running Environment:
Once all processes are successful, the environment will be running.

Step 13: Accessing Your Application:
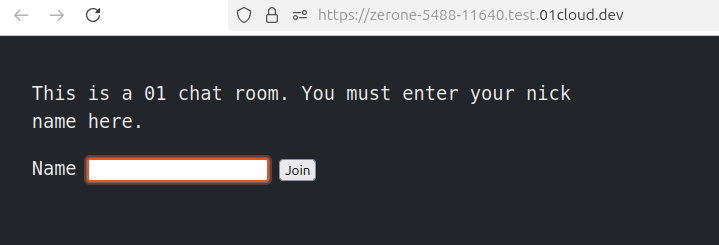
You can access and use your application from the domain provided by 01Cloud in the status section. Simply click the link to run your application.
Managed Service Environment:
Step 1: Access the Application:
Create a Managed Service App like postgresql, click the CREATE ENVIRONMENT button to begin the environment creation process.

Step 2: Select the Environment Version:
On the next page, you will be prompted to choose the version of the environment you wish to create and click CONTINUE button.

Step 3: Choose Quick or Custom Installation:
You will have two options: Quick Installation and Custom Installation. If you choose Quick Installation, all fields will be set to default values during the environment creation process.

If you choose Custom Installation, you will have various options for customizing the environment.

Step 4: Providing Environment Details:
Now provide a name for the environment. The default name is development and you can select the branch of your code you want to create the environment for. You can also select the amount of resources you want your environment to use.

Step 5: Initiating Environment Creation:
Click the CREATE ENVIRONMENT button to start the environment creation process.
Step 6: Overview Tab:
You can view the activity log and other basic environment status in the Overview Tab.

Step 7: Running Environment:
Once all processes are successful, the environment will be running.

External Url:
In 01cloud, the external URL is a feature available across all managed services and certain addon features to enable secure access from outside the internal cloud network. It acts as a public endpoint that makes services accessible to external clients, applications, or systems not hosted on the 01cloud platform.
Purpose of External URL in 01Cloud:
-
External Connectivity: The external URL is designed to allow external applications or users to connect to a managed service, such as PostgreSQL, Redis, or RabbitMQ, for use cases that require remote access—like integrations, analytics, or multi-platform applications.
-
Controlled Access via IP Whitelisting: The external URL is typically paired with IP whitelisting options, allowing administrators to define which external IP addresses can connect to the service. This ensures that only trusted sources have access to the endpoint, enhancing security.
-
Ease of Integration: For developers, the external URL simplifies integration with third-party services, enabling data exchange, external storage access, or remote management of the service without needing a VPN or private network setup.
-
Availability for Addons and Services: The external URL feature extends to various addons and managed services, making it easier to integrate additional resources, such as databases, message brokers, and storage, directly into an application’s workflow with minimal setup.
Step 8: Enable External Url:
Click on enable External Url from the Overview Tab in the above Managed Service Environment.

Step 9: Accessing Your Application:
You can access managed service application from the terminal by enabling external url, you can also get the login details from variables by clicking on See Variables.
Conclusion
Now, you have successfully created a environment on 01Cloud. You can now explore different tabs in the environment, such as the CI/CD tab, the Overview tab, and others, to understand their functions and make the most out of your environment. For a more detailed understanding of the different tabs in the environment, you can view the documentation available on the 01Cloud website.
